Headline
CVE-2021-45896: WIP: Hacking the Nokia Fastmile
Nokia FastMile 3TG00118ABAD52 devices allow privilege escalation by an authenticated user via is_ctc_admin=1 to login_web_app.cgi and use of Import Config File.
As a part of my 5G home internet offering, Optus bundles a 5G gateway called the Nokia Fastmile. The same device seems to be shipped by T-Mobile for their 5G offering and is passionately known as the ‘trashcan’ in r/tmobileisp.
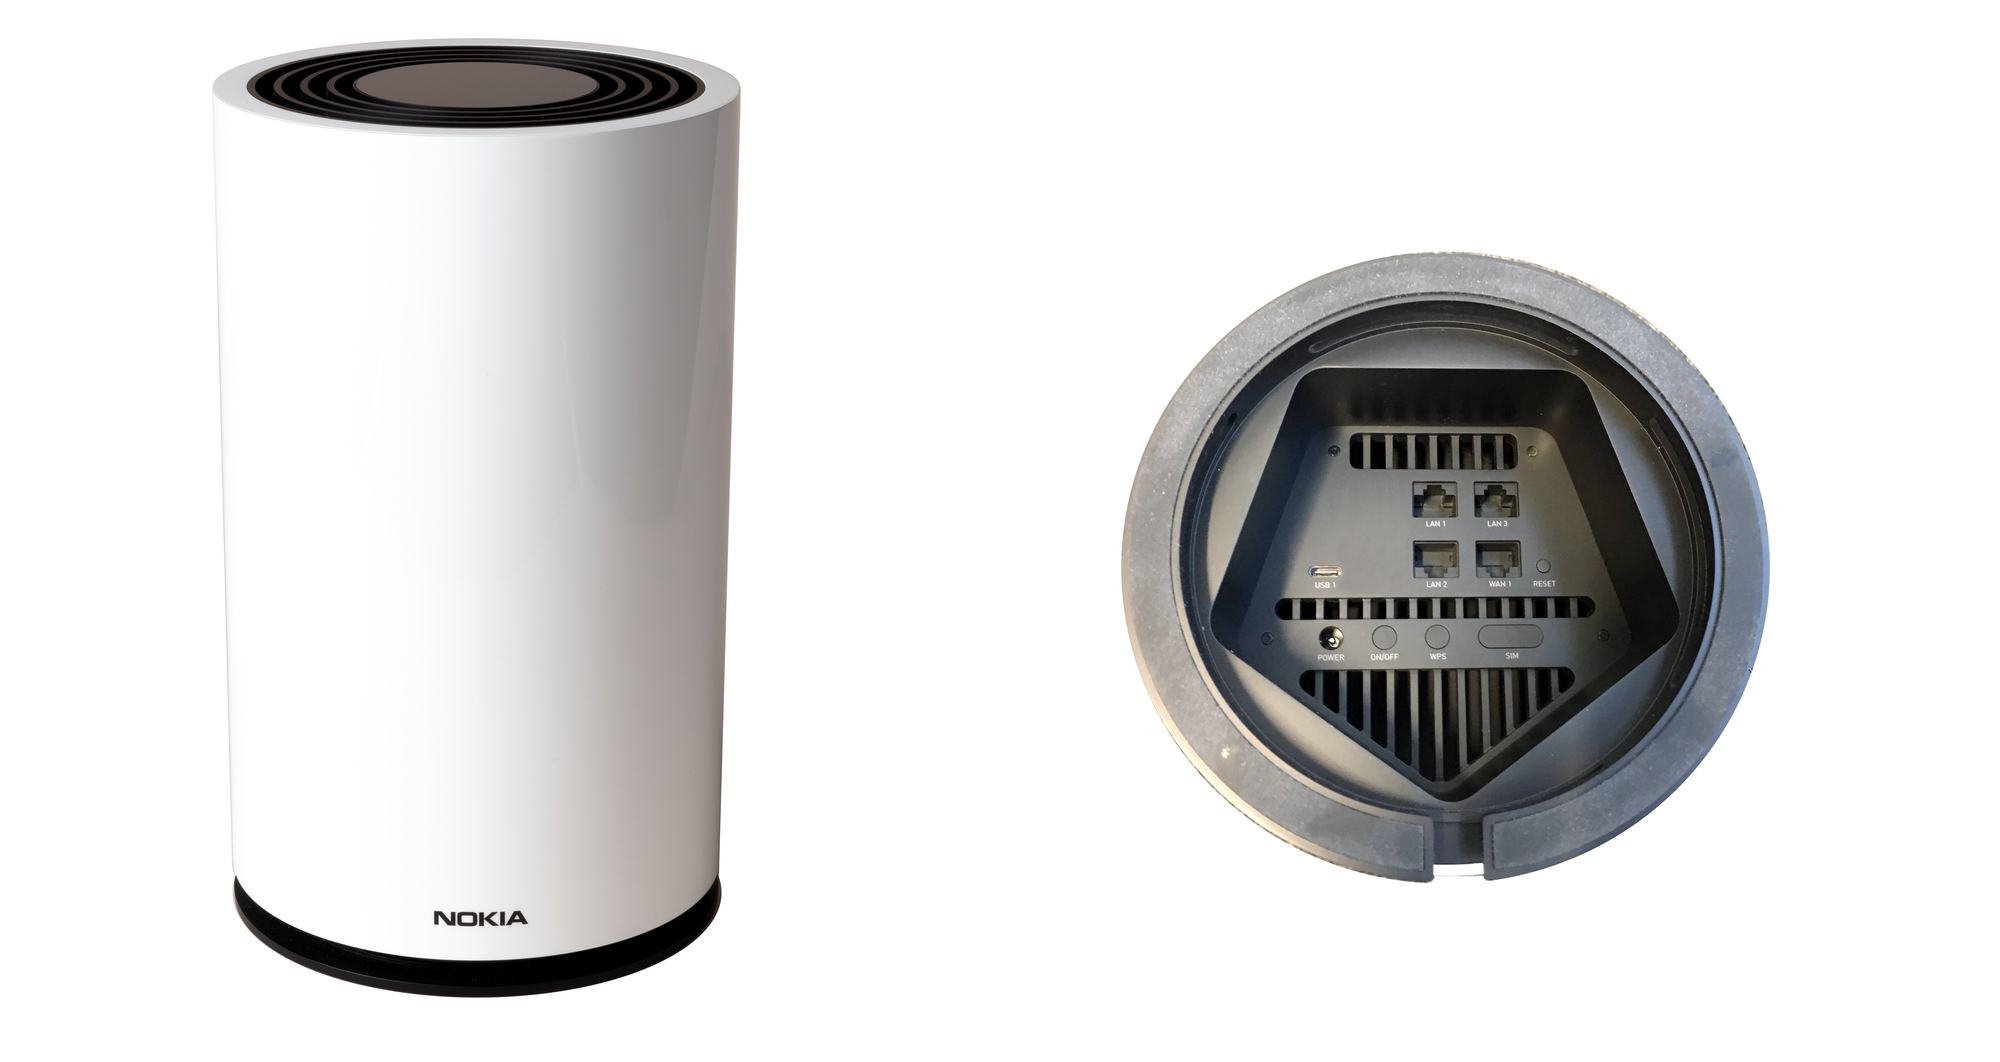
Nokia Fastmile Stock Photo
Naturally, the first thing I tried to do is to obtain root access on it.
Finding a Privilege Escalation Bug
EDIT: This has been assigned CVE-2021-45896.
Immediately, the first thing I noticed is that the provided userAdmin credentials printed on the bottom of the device seem to be a low level account.
Taking a peak at the requests going on when logging in immediately reveals an authenticated privilege escalation vulnerability. This likely also affects other Nokia devices. My firmware version: 3TG00118ABAD52.
When logging in, a call is made to POST /login_web_app.cgi.
If you intercept the response you will see that there is a variable called "is_ctc_admin".

Change “is_ctc_admin” to 1
If you change this in the response to 1 you get access to additional functionality and full admin. The vulnerability is a classic access control issue where authorisation is handled only on the client side.
Now we have access to an additional tab but also more functionality in some existing tabs.

SPAN Ports!

QOS

Backup and Restore Configuration
Modifying the Configuration
Doing some Googling I came across this smart guy who figured out the format of Nokia’s configuration file format and wrote a tool to unpack, and pack configuration files so that you can make changes that aren’t available through the web interface.
Unlocking IAM’s Nokia G-240W-A router (Part 1) · 0x41.cf
![]()

The tool he wrote also works for the Nokia Fastmile: https://gist.github.com/thedroidgeek/80c379aa43b71015d71da130f85a435a
Following the write-up gets us all the way to SSH/Telnet access to the device however we are stopped by this annoying password prompt for shell access.
None of the passwords in the configuration file work for this shell password.

???
Some other comments mention changing LimitAccount_ONTUSER to false and logging in with ONTUSER:SUGAR2A041 however this doesn’t seem to work for the Fastmile.
Giving Up and Moving to Looking at Hardware
randomsrvapps over at Whirlpool seems to have managed to get a trivial root shell via UART/ADB revealing that the device is Android based? Lets verify this.
Flipping the device over we see some ports that seem to be covered (circled in yellow on the photo).
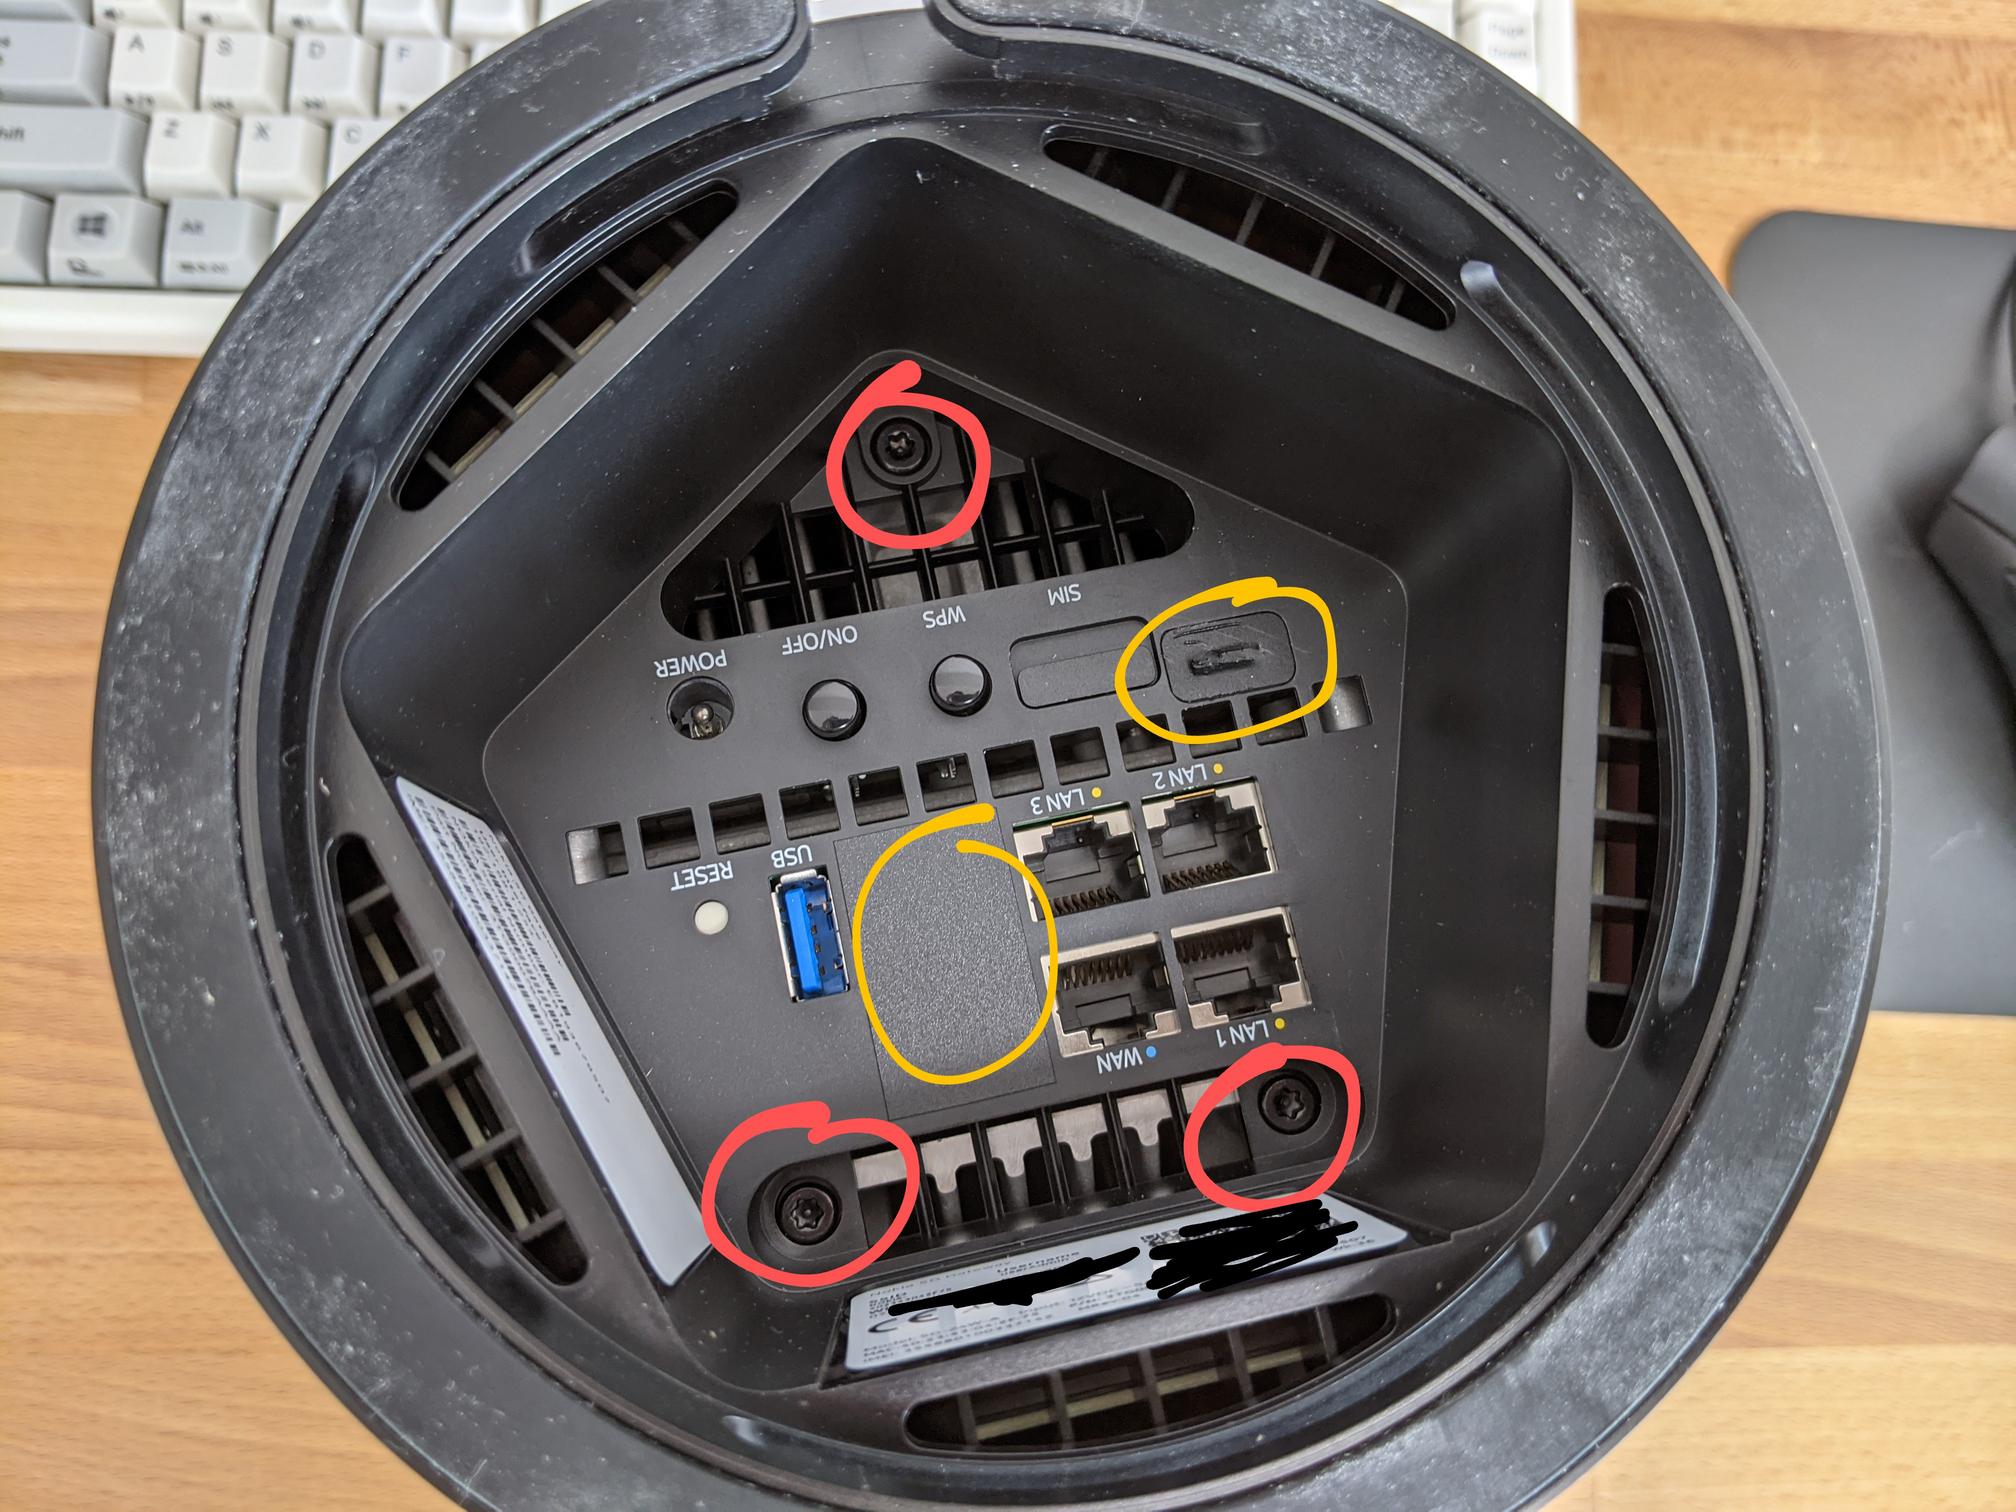
These stickers can only be uncovered from the rear as the stickers they used are quite strong. By undoing circled bolts in red (Torx T15H) and removing the sim card, the feet come off and we can poke out the stickers.
This reveals a USB-C port and two RJ12 ports.
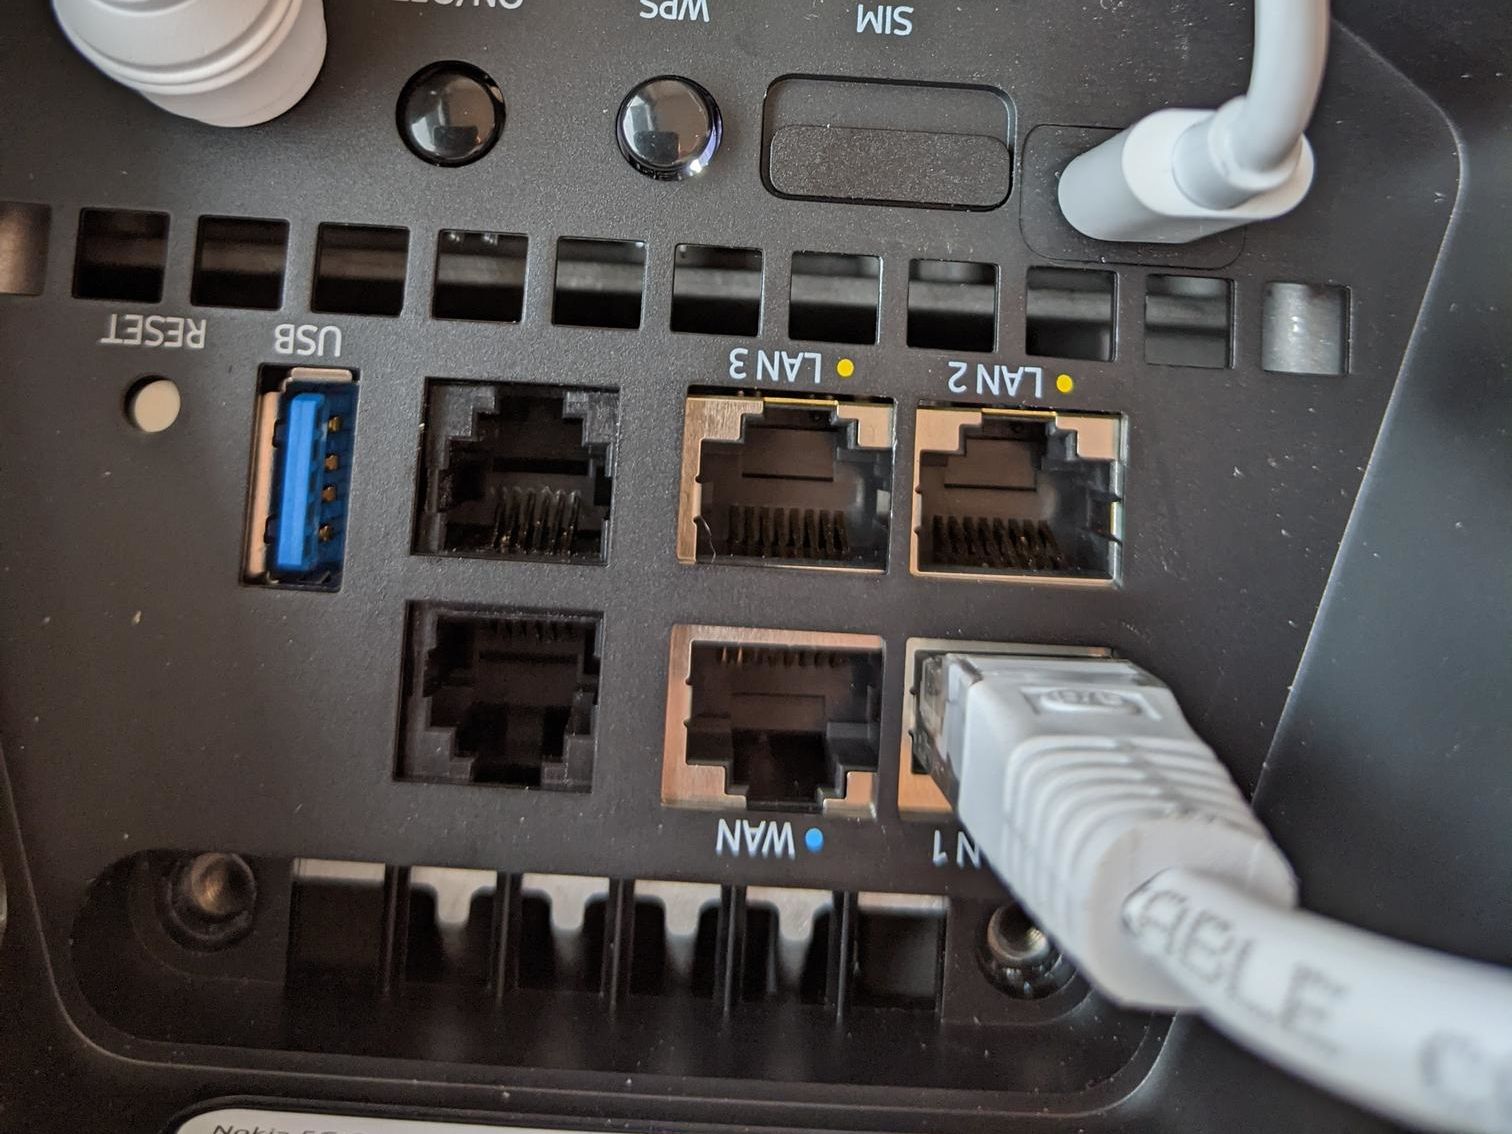
USB-C is Top Right
It runs Android?
As per the thread, plugging into the USB-C port and running ADB shell gives us an immediate root shell on the device.
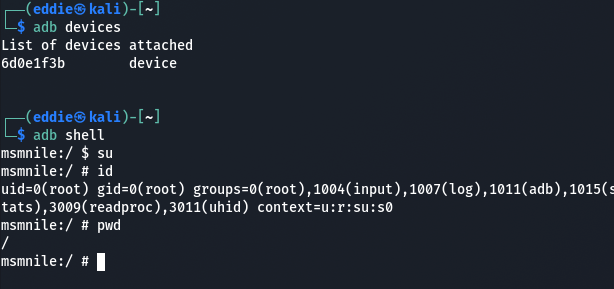
Interestingly it has a Snapdragon 855 in it, the same processor that was in previous generation flagships like the Google Pixel 4.
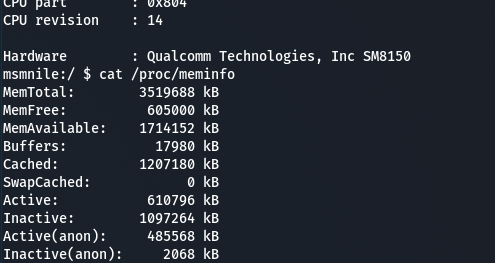
Snapdragon 855
I also confirmed that you can get this same console access by plugging into the pins outlined in the thread. These terminals are 1.8v logic level and the pins from inside to out are RX, TX, and ground with a baud rate of 115200.
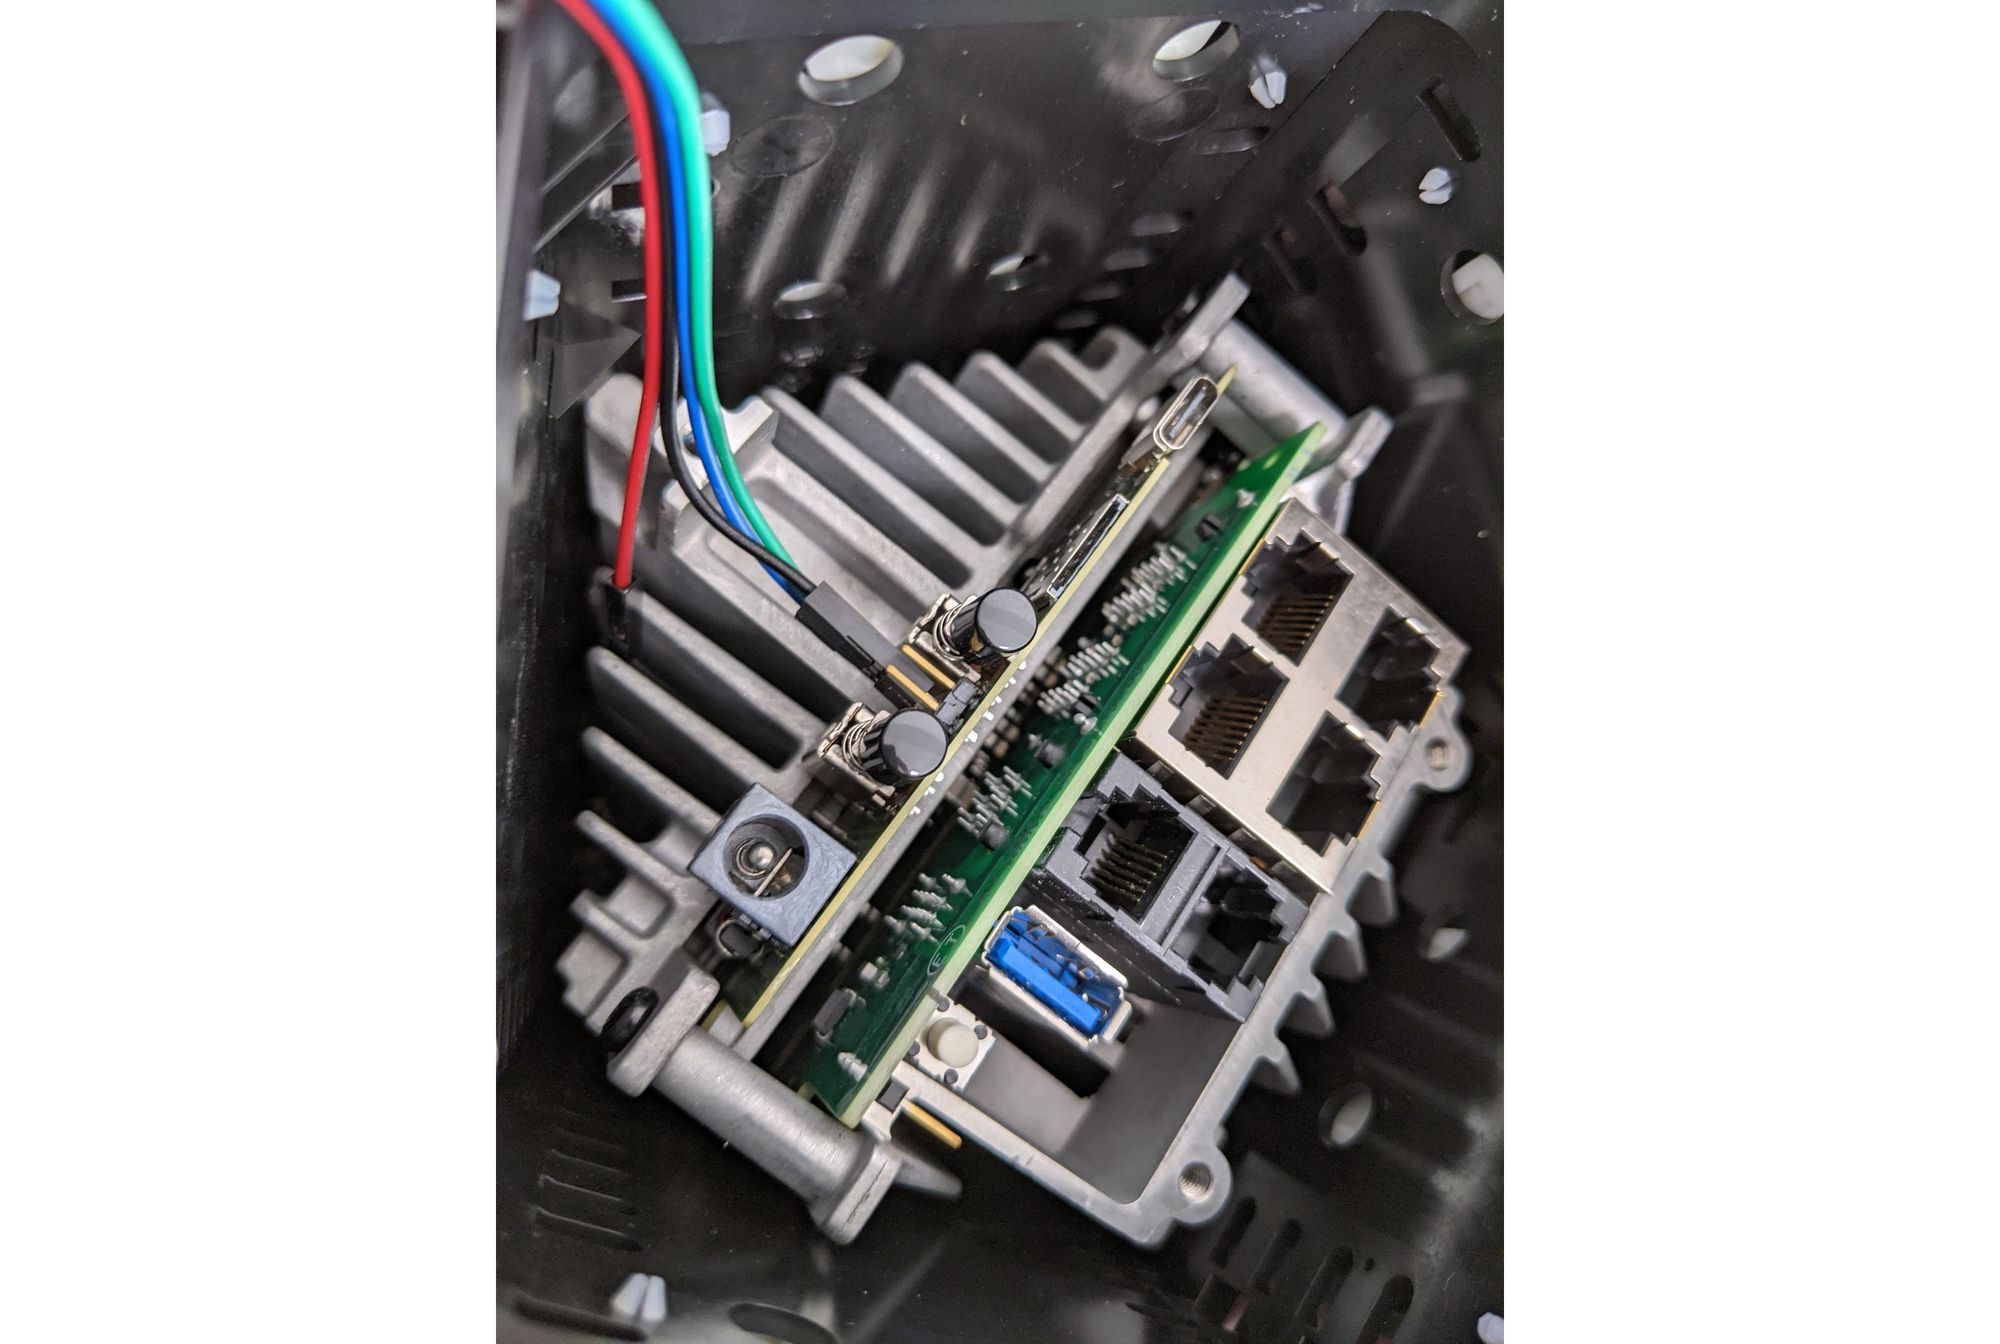
Having a poke around via ADB shell reveals some oddities.
The most noteworthy being that the IP addressing scheme of my local network configured via the WEB-UI (172.10.0.0/24) is non-existent and some random private subnet 192.168.85.0/24 shows up.
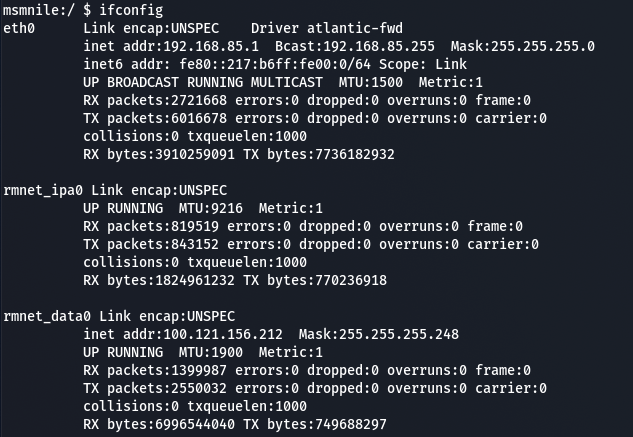
Performing a traceroute from my local machine we see traffic get routed through this 192.168.85.0/24 subnet as well.

The First Hop Is My pfsense Firewall (I’m Running Double NAT)
This can also be verified by performing a tcpdump with a filter on the Fastmile whilst pinging 9.9.9.9.

Why is our IP address 192.168.85.6??
I immediately copied over a precompiled binary of busybox onto the Fastmile to try to run ARP.

Then the realisation came.
It’s Two Devices in One Box!
Nokia have basically taped a 5G capable phone to one of their old Alcatel-Lucent routers and shipped it in a cylindrical box. This also explains why the configuration modification tool earlier worked flawlessly.
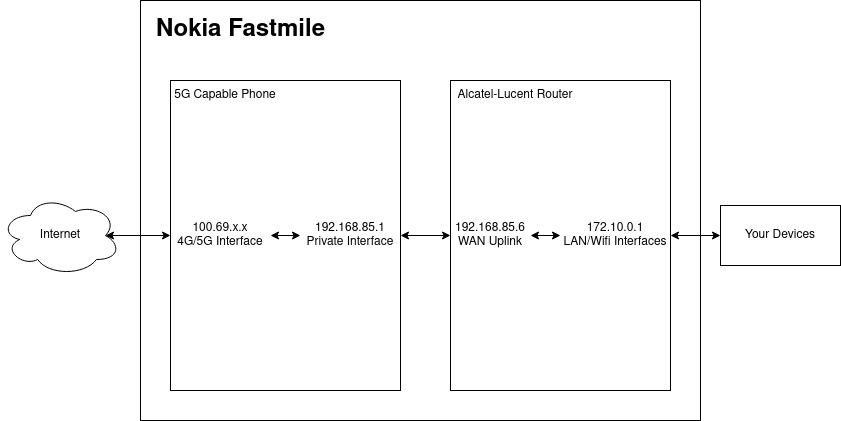
Having root on the Android side doesn’t help at all with getting root on the router side!
Using this knowledge we can also enable remote Android debugging by first adding a firewall rule.
iptables -I INPUT 1 -s 192.168.85.6 -j ACCEPT

Enabling remote debugging on a port.
adb tcpip 5555 //While connected via USB.
Then connecting remotely without having to be tethered to the device.

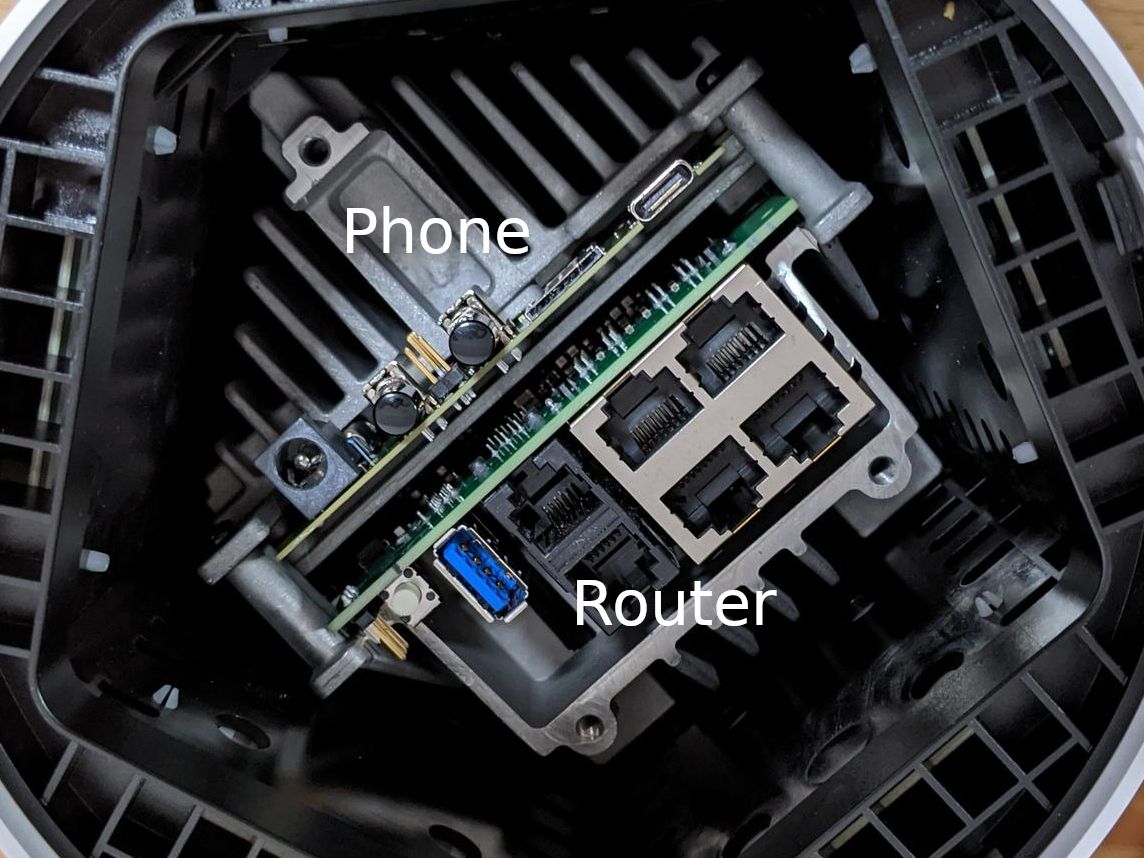
Looking back at the physical device again you can even see two different PCB types.
UART pins are also provided for the router side that are easily accessible. These pins are 3.3v logic level and the pins from inside out are ground, RX, TX with a baud rate of 115200.
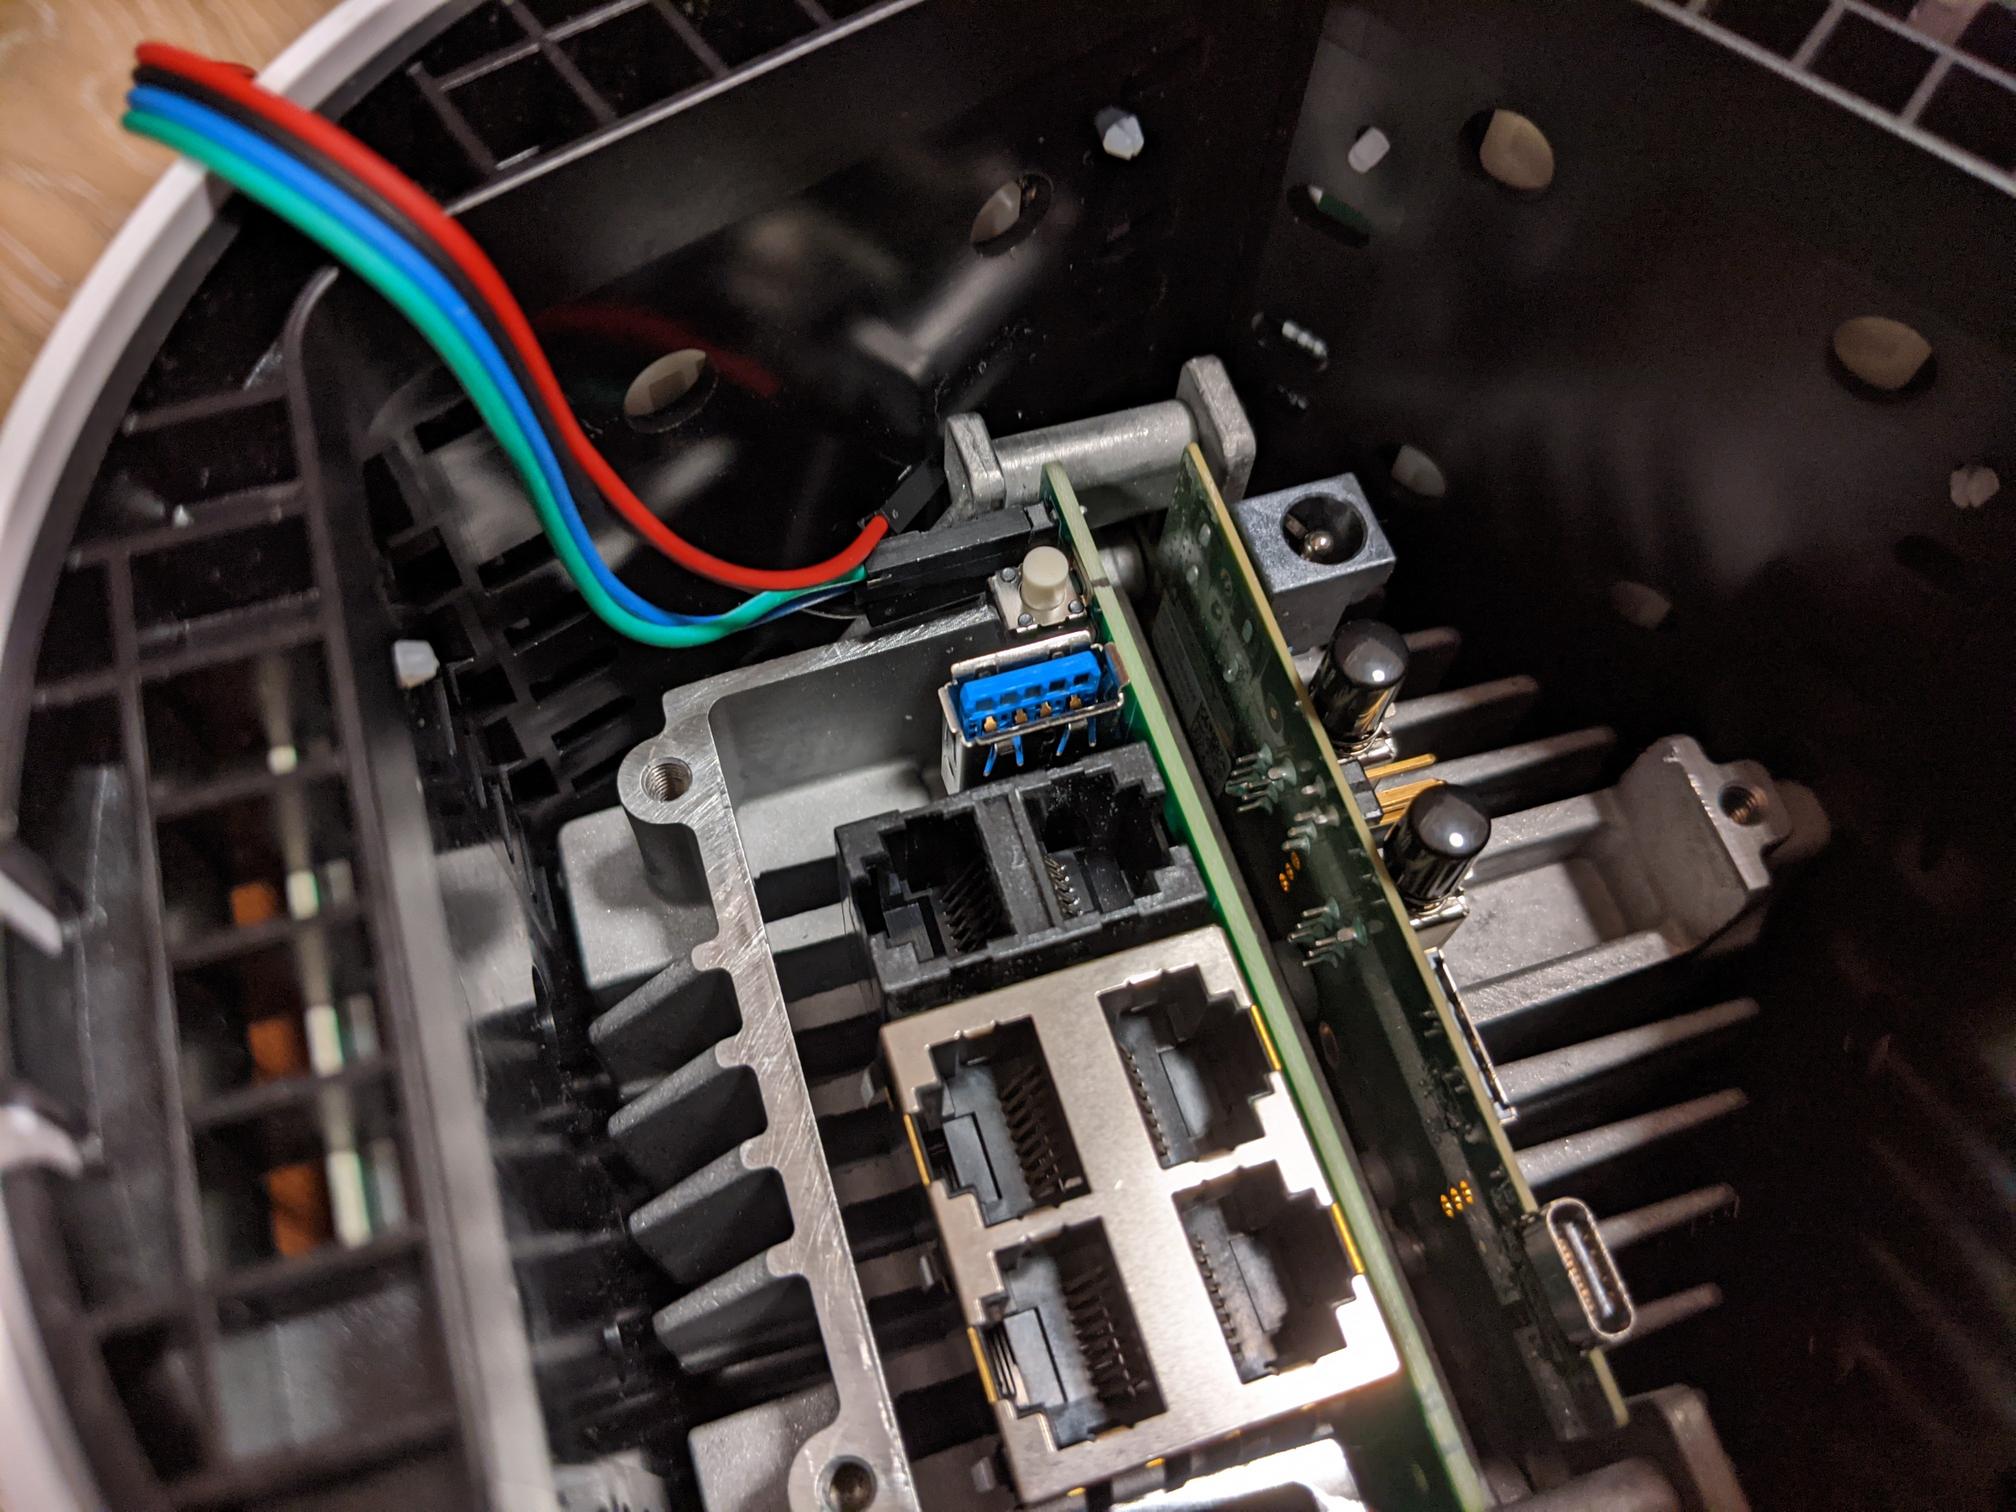
Letting it boot whilst connected via UART drops us into the same restricted shell that we had earlier via SSH where we don’t know the ‘shell’ password. Not helpful.
Interrupting boot drops us in CFE but I don’t have the patience to dump the image over serial as that would take ~4 days. Otherwise, I’m not too familiar with CFE and am not super keen on turning my Fastmile into a $400 brick.
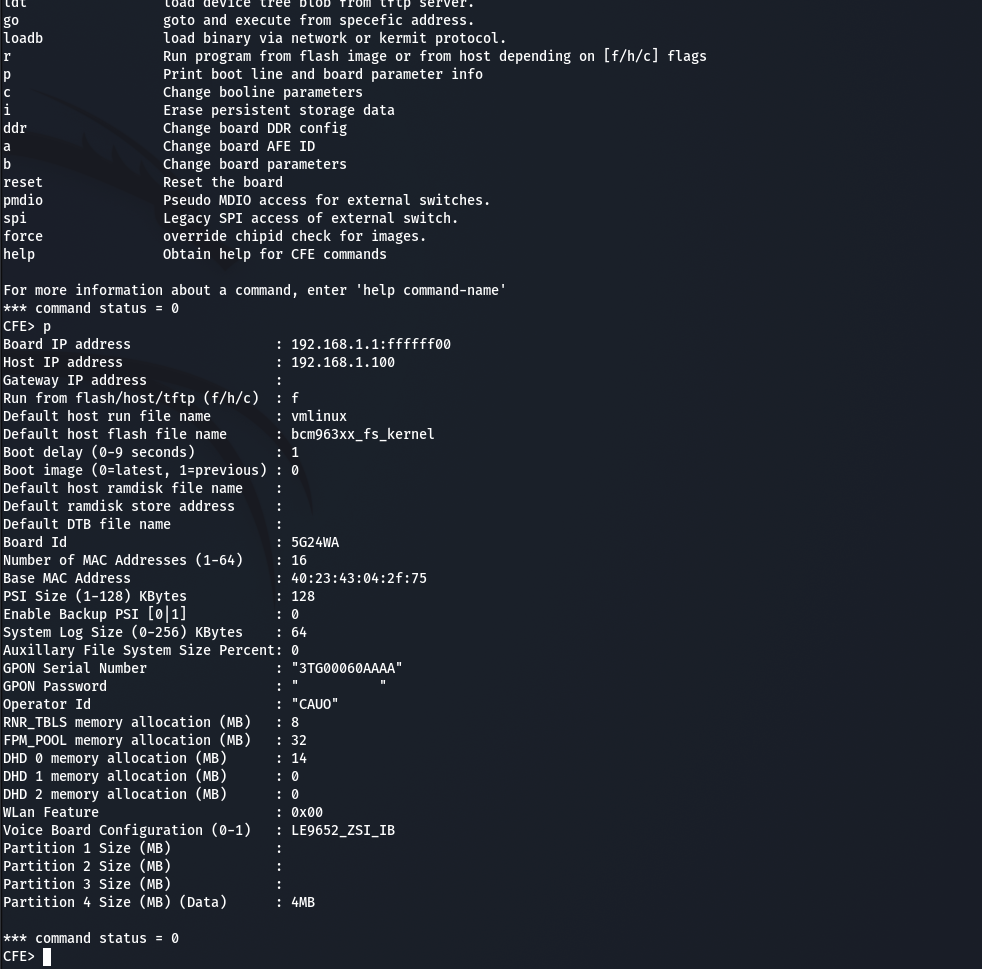
Changing the GPON Password Board Parameter Doesn’t Do Anything
If anyone else has any advice/knowledge feel free to ping me at email, we still aren’t root after all this.
Teardown
Out of curiosity, I took the device apart a bit more as I hadn’t seen any other write-ups detailing this.
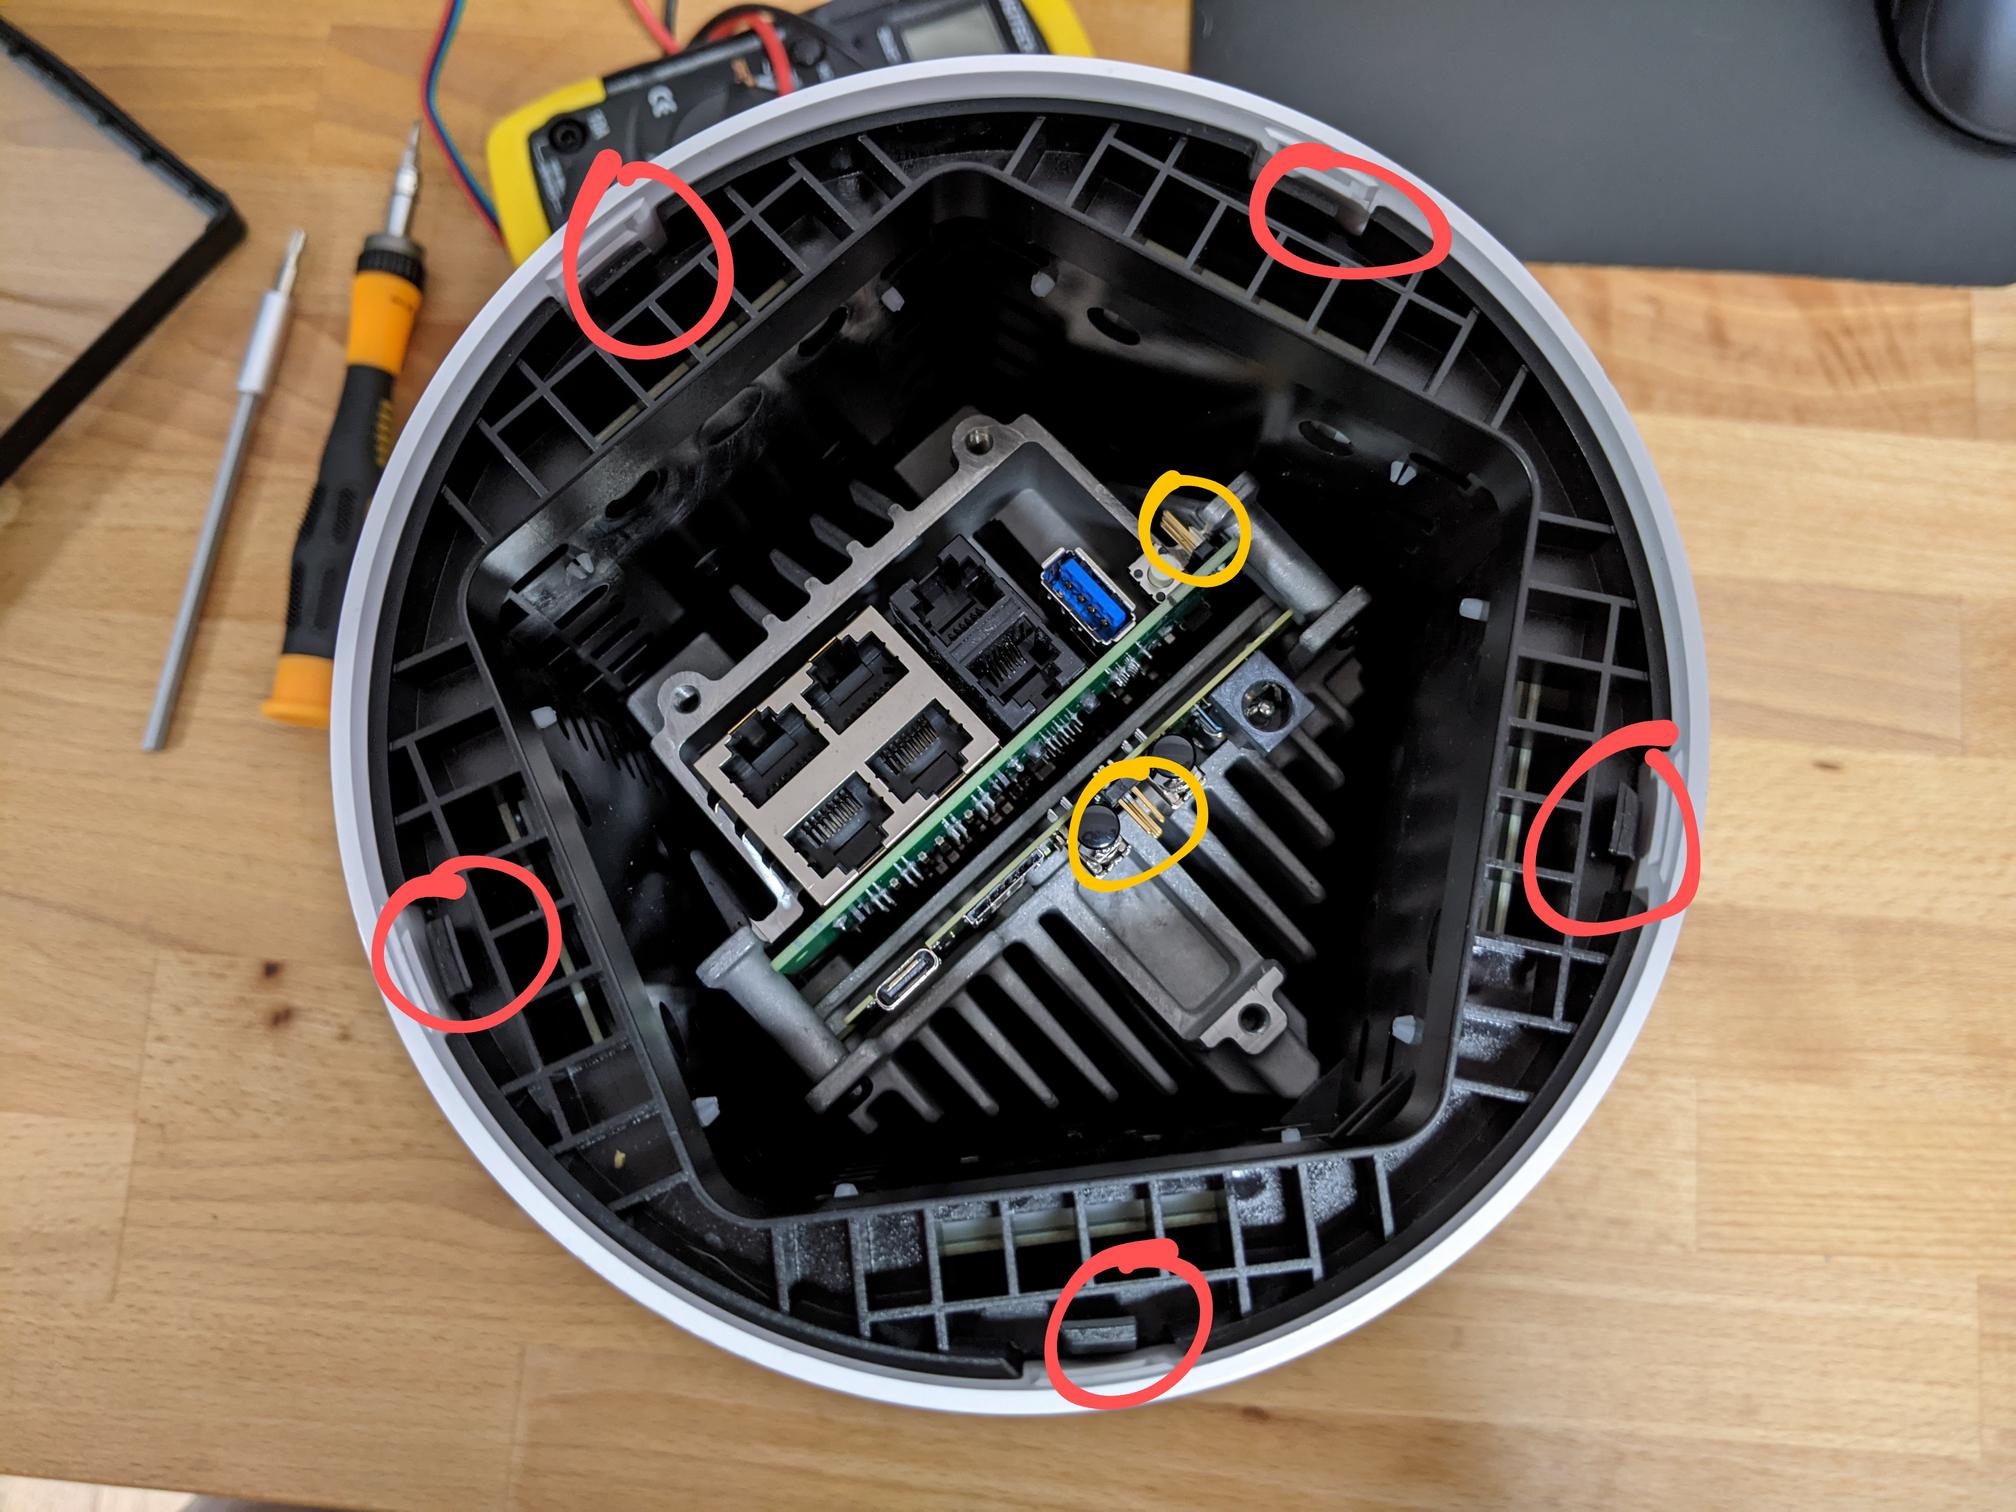
Tracing back to the step where we’d removed the bottom of the device, the next step of disassembly is to bend back the clips around the perimeter circled in red. I’ve also circled the UART pins in yellow for clarity.
Now you can flip the device and lift up the white shell to reveal the antennas.
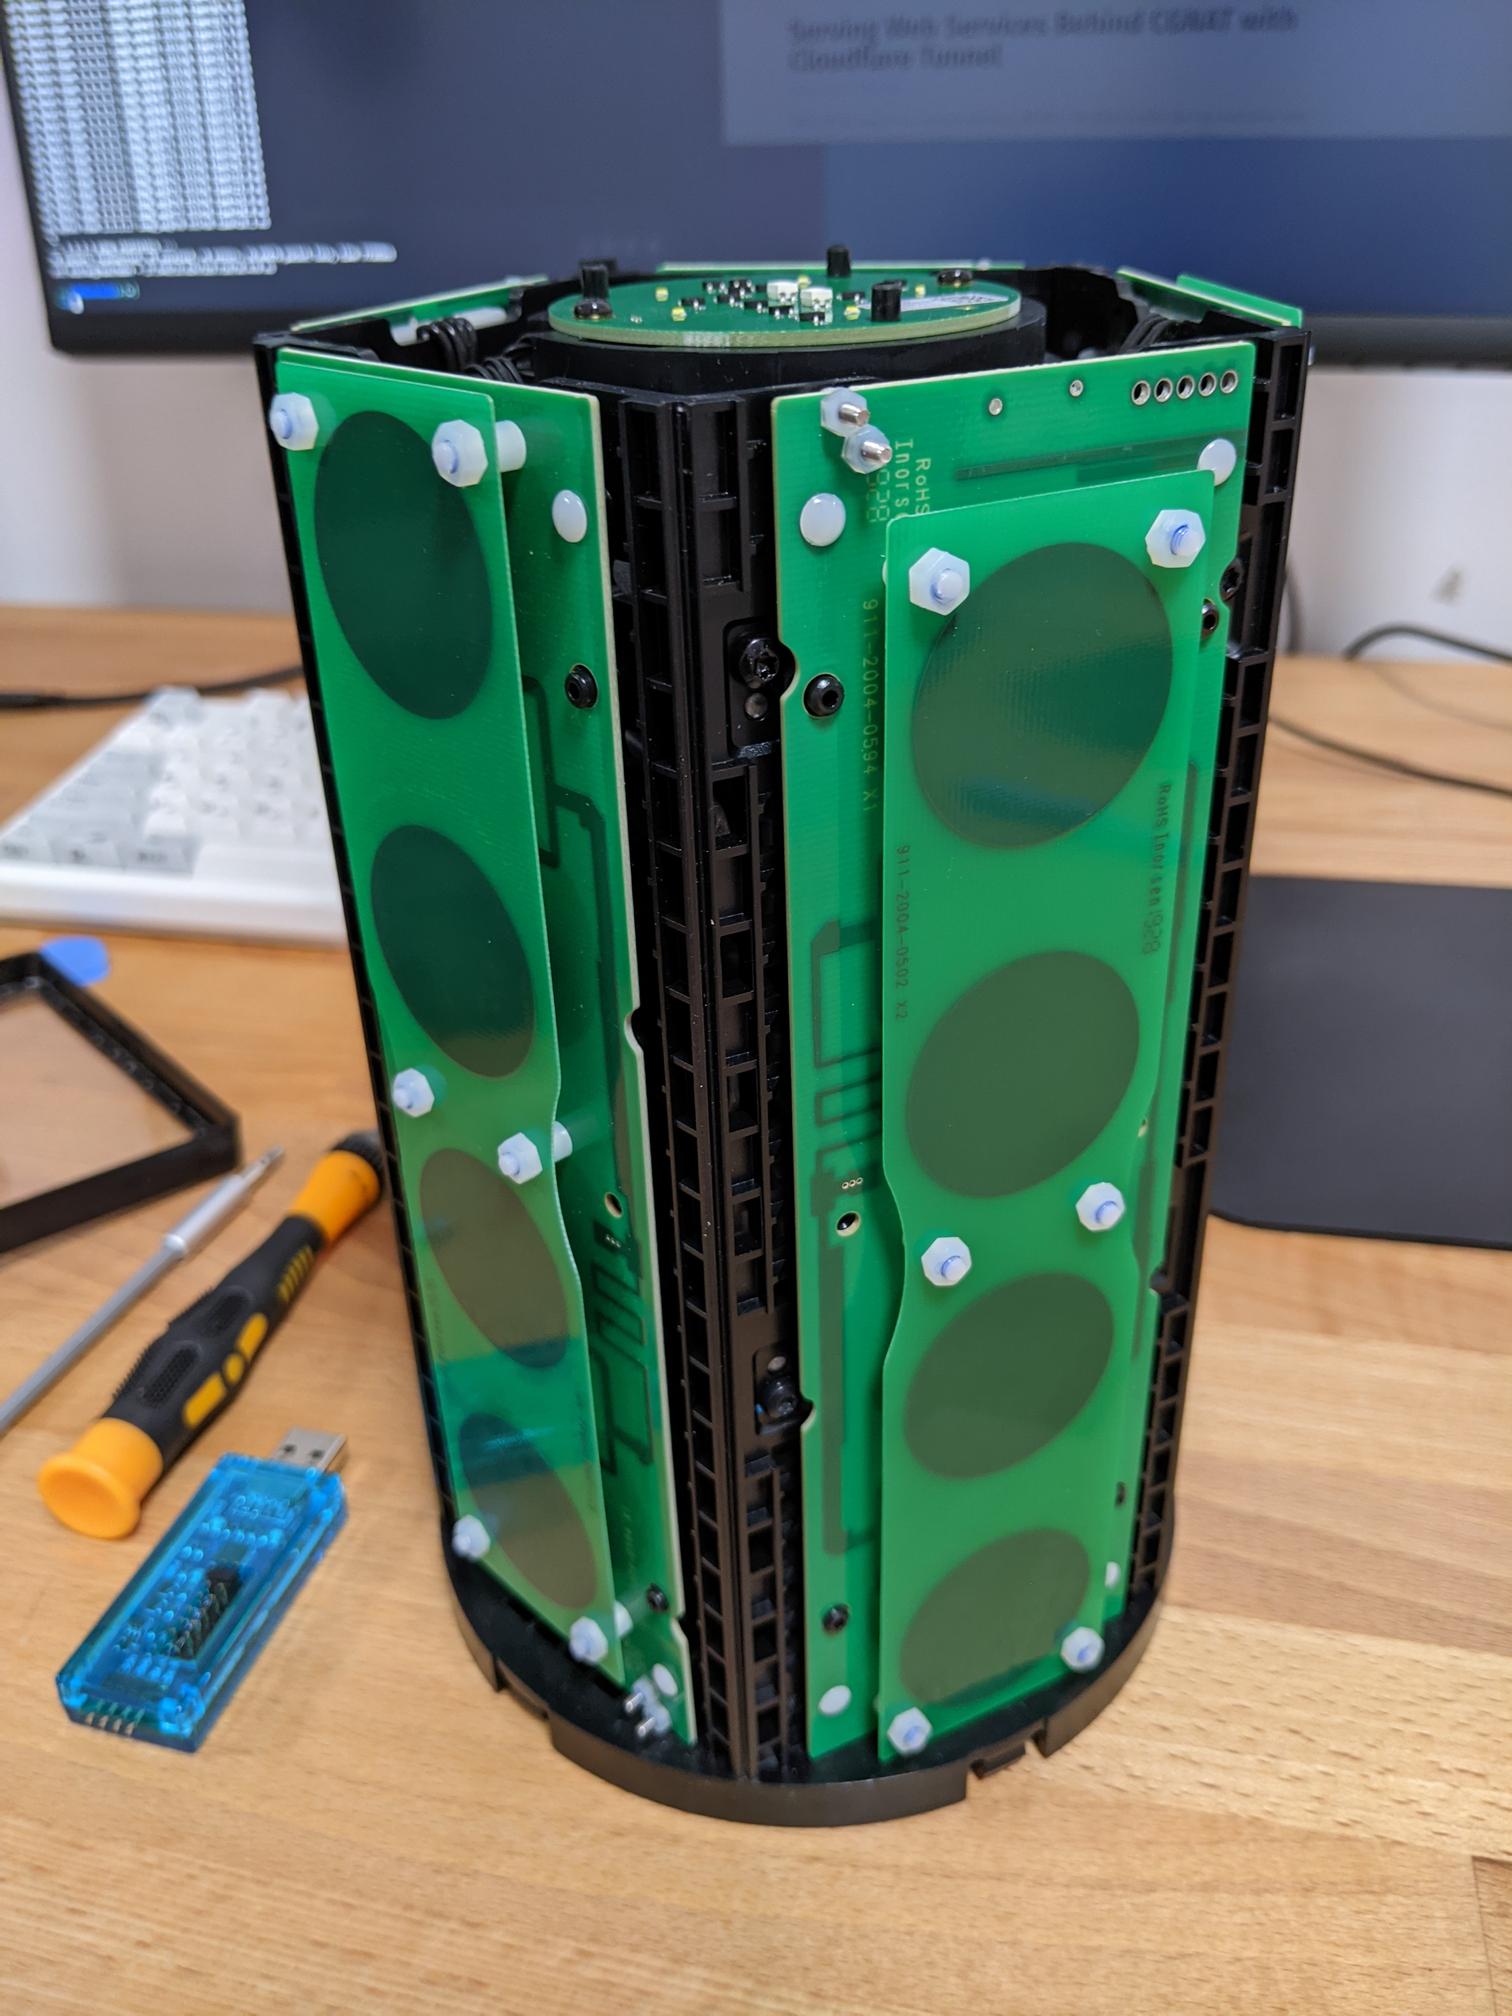
Every bolt from here on is a Torx T8H. Looking at the top there are 5 bolts to undo which loosen the LED indicator board.
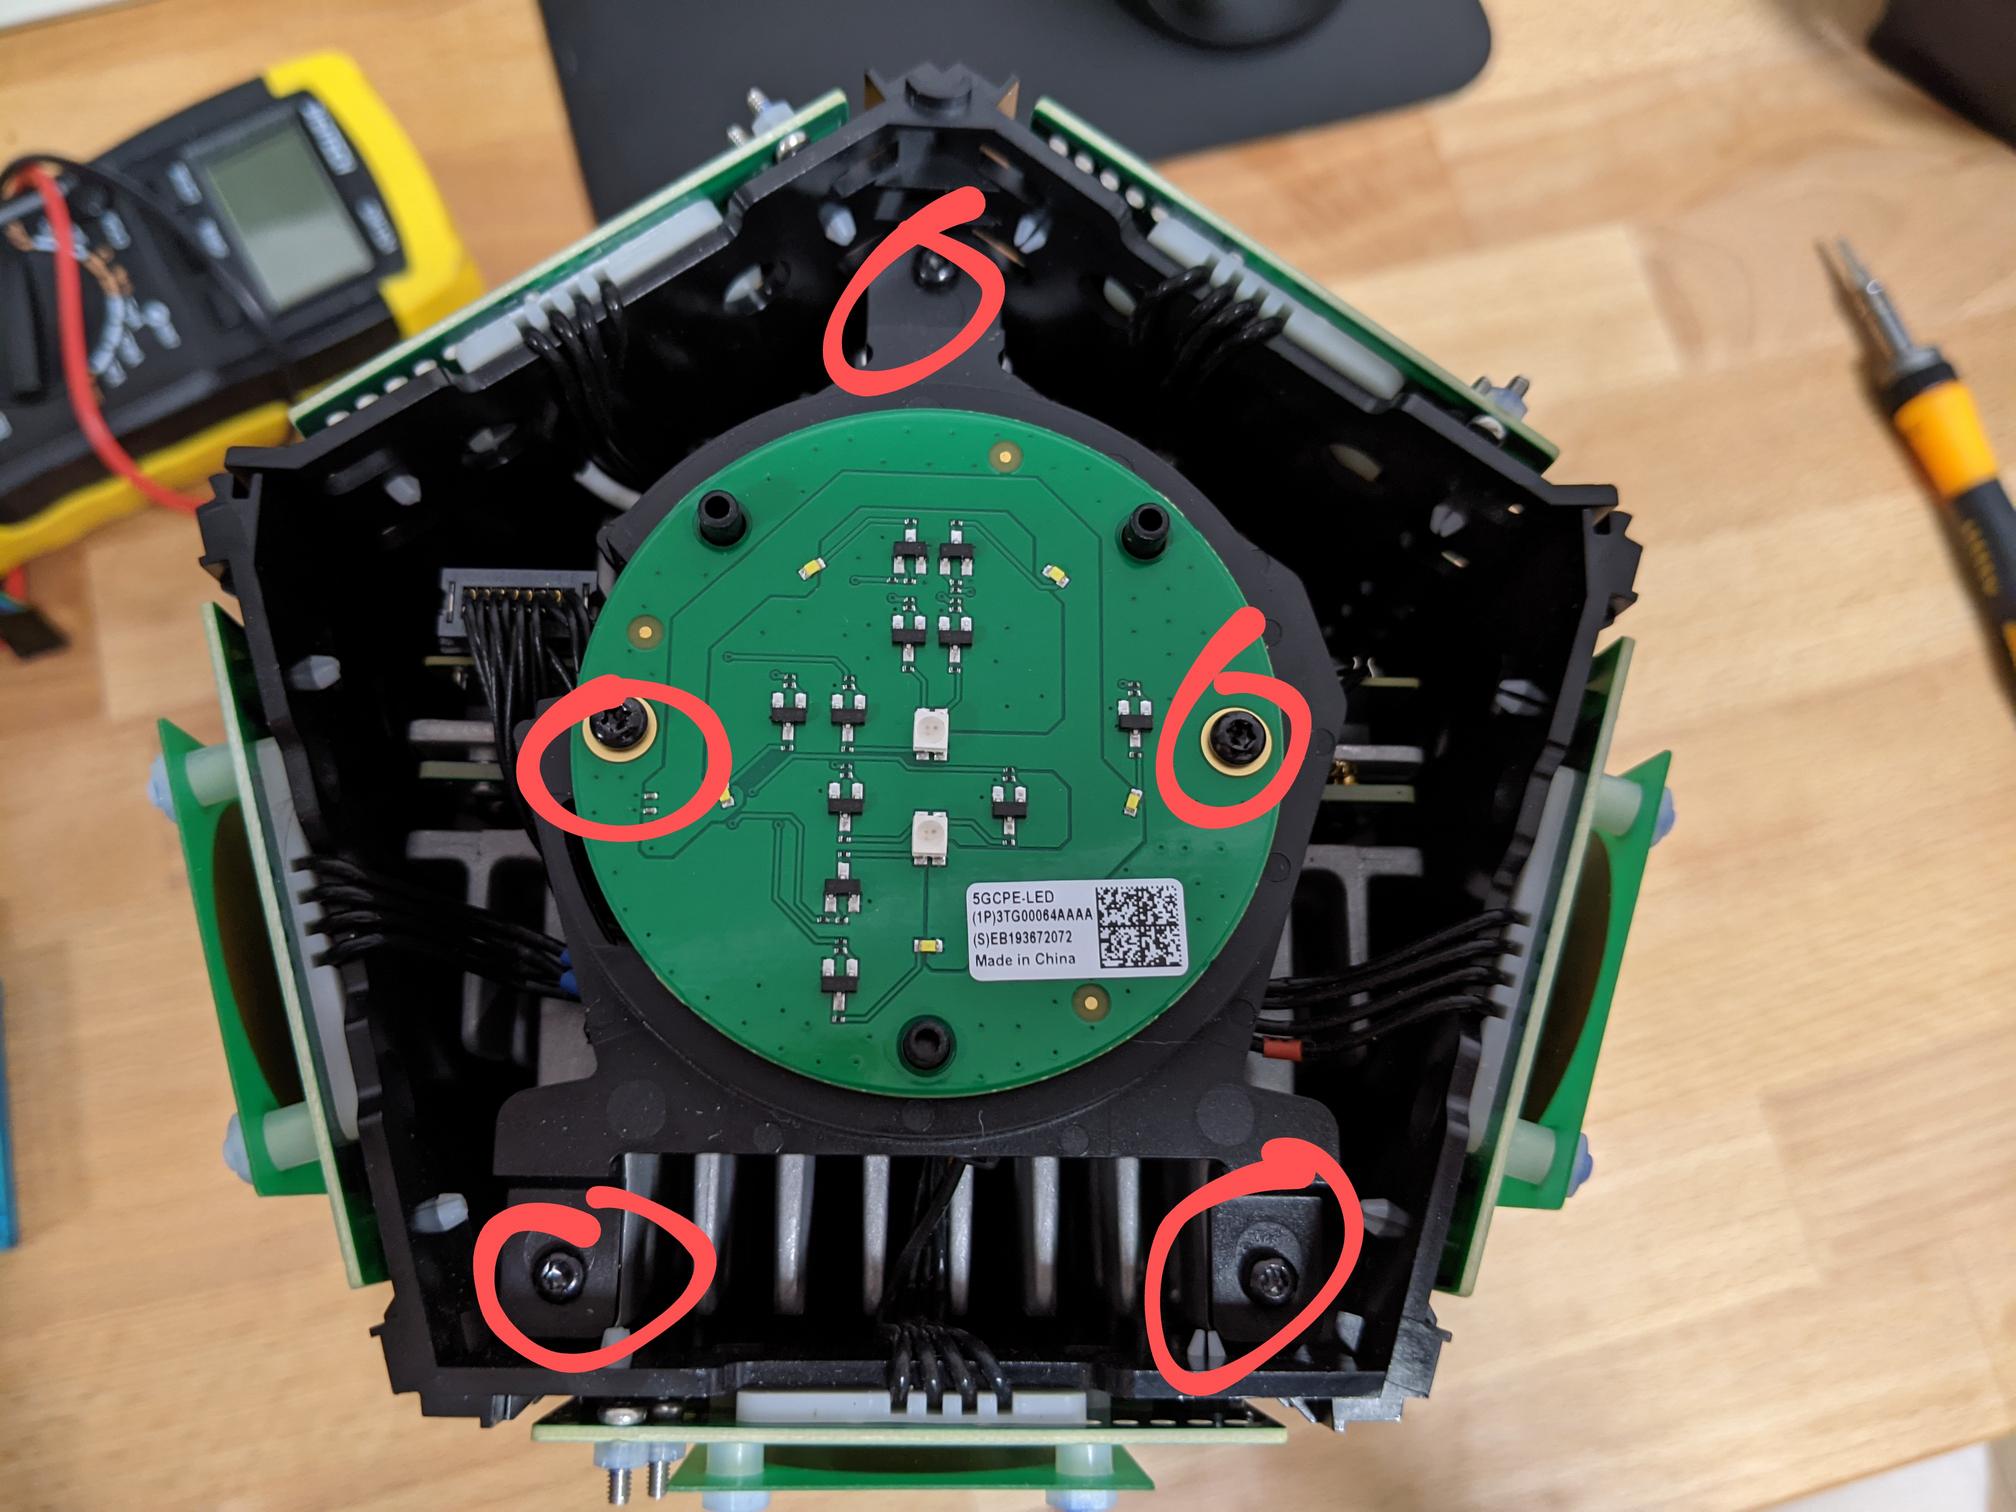
With the top LED indicator board off we can see where all the antenna’s terminate. If you wanted to attach an external antenna, this is where you’d do it.
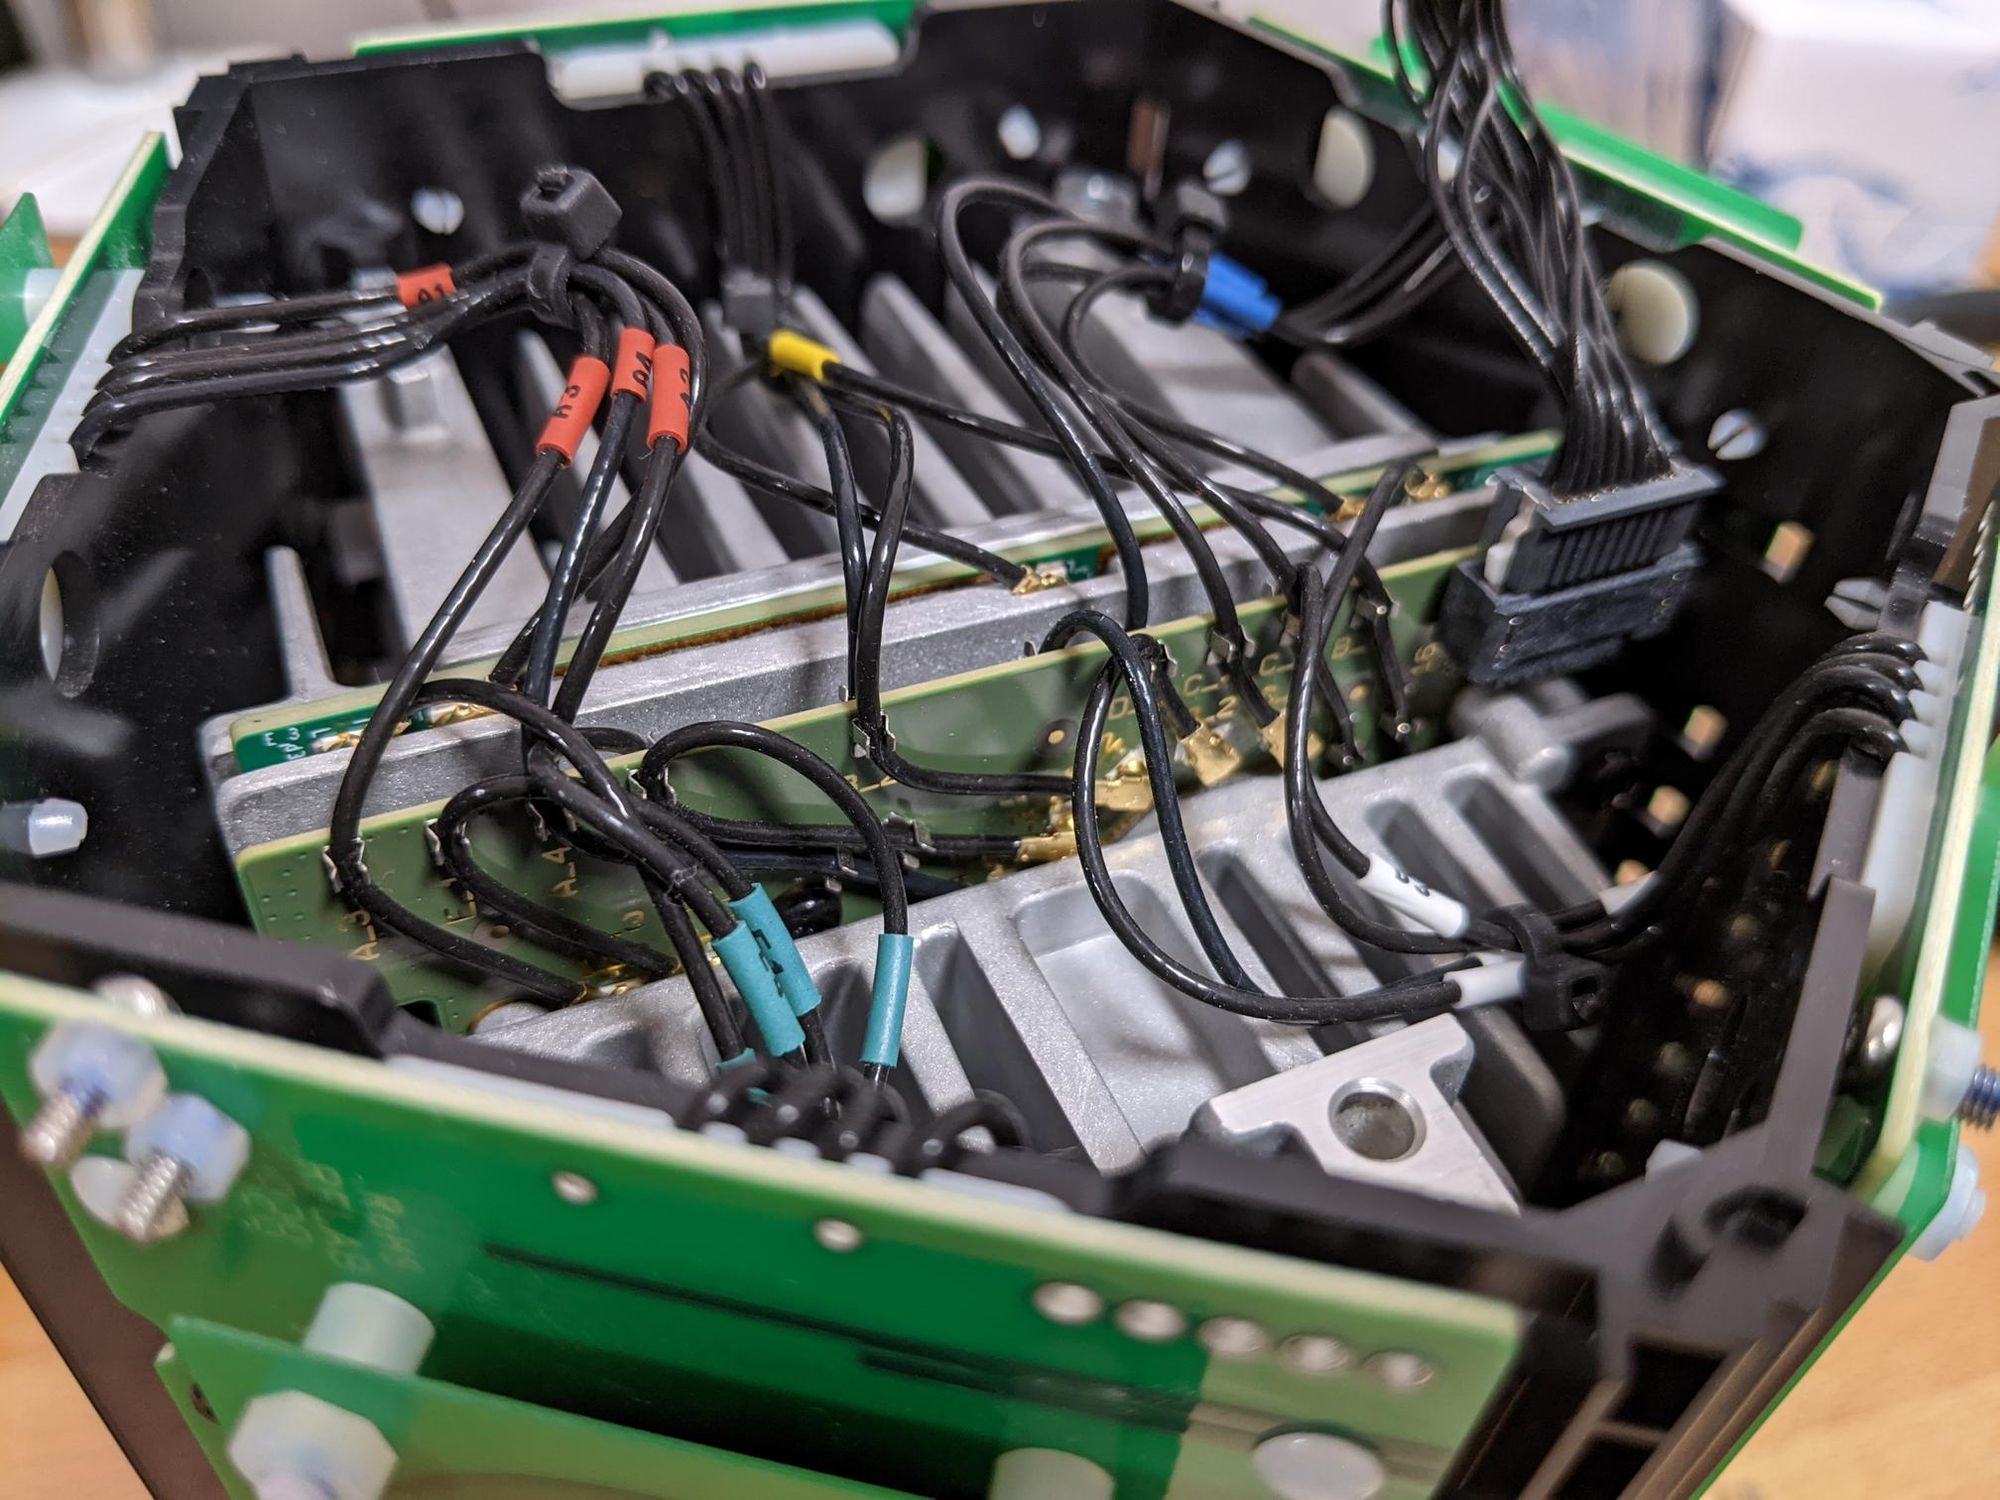
Unfortunately, accessibility to the connectors is very limited as some snake under the heatsink. I did try removing the heatsink later but it was pretty solidly bound to the PCB so I’m not sure if it’s held together with a thermal epoxy or if I missed some bolts.
Next up, looking at the side of the device with the smaller heatsink (Android side), there are two more bolts on the diagonal face to loosen.
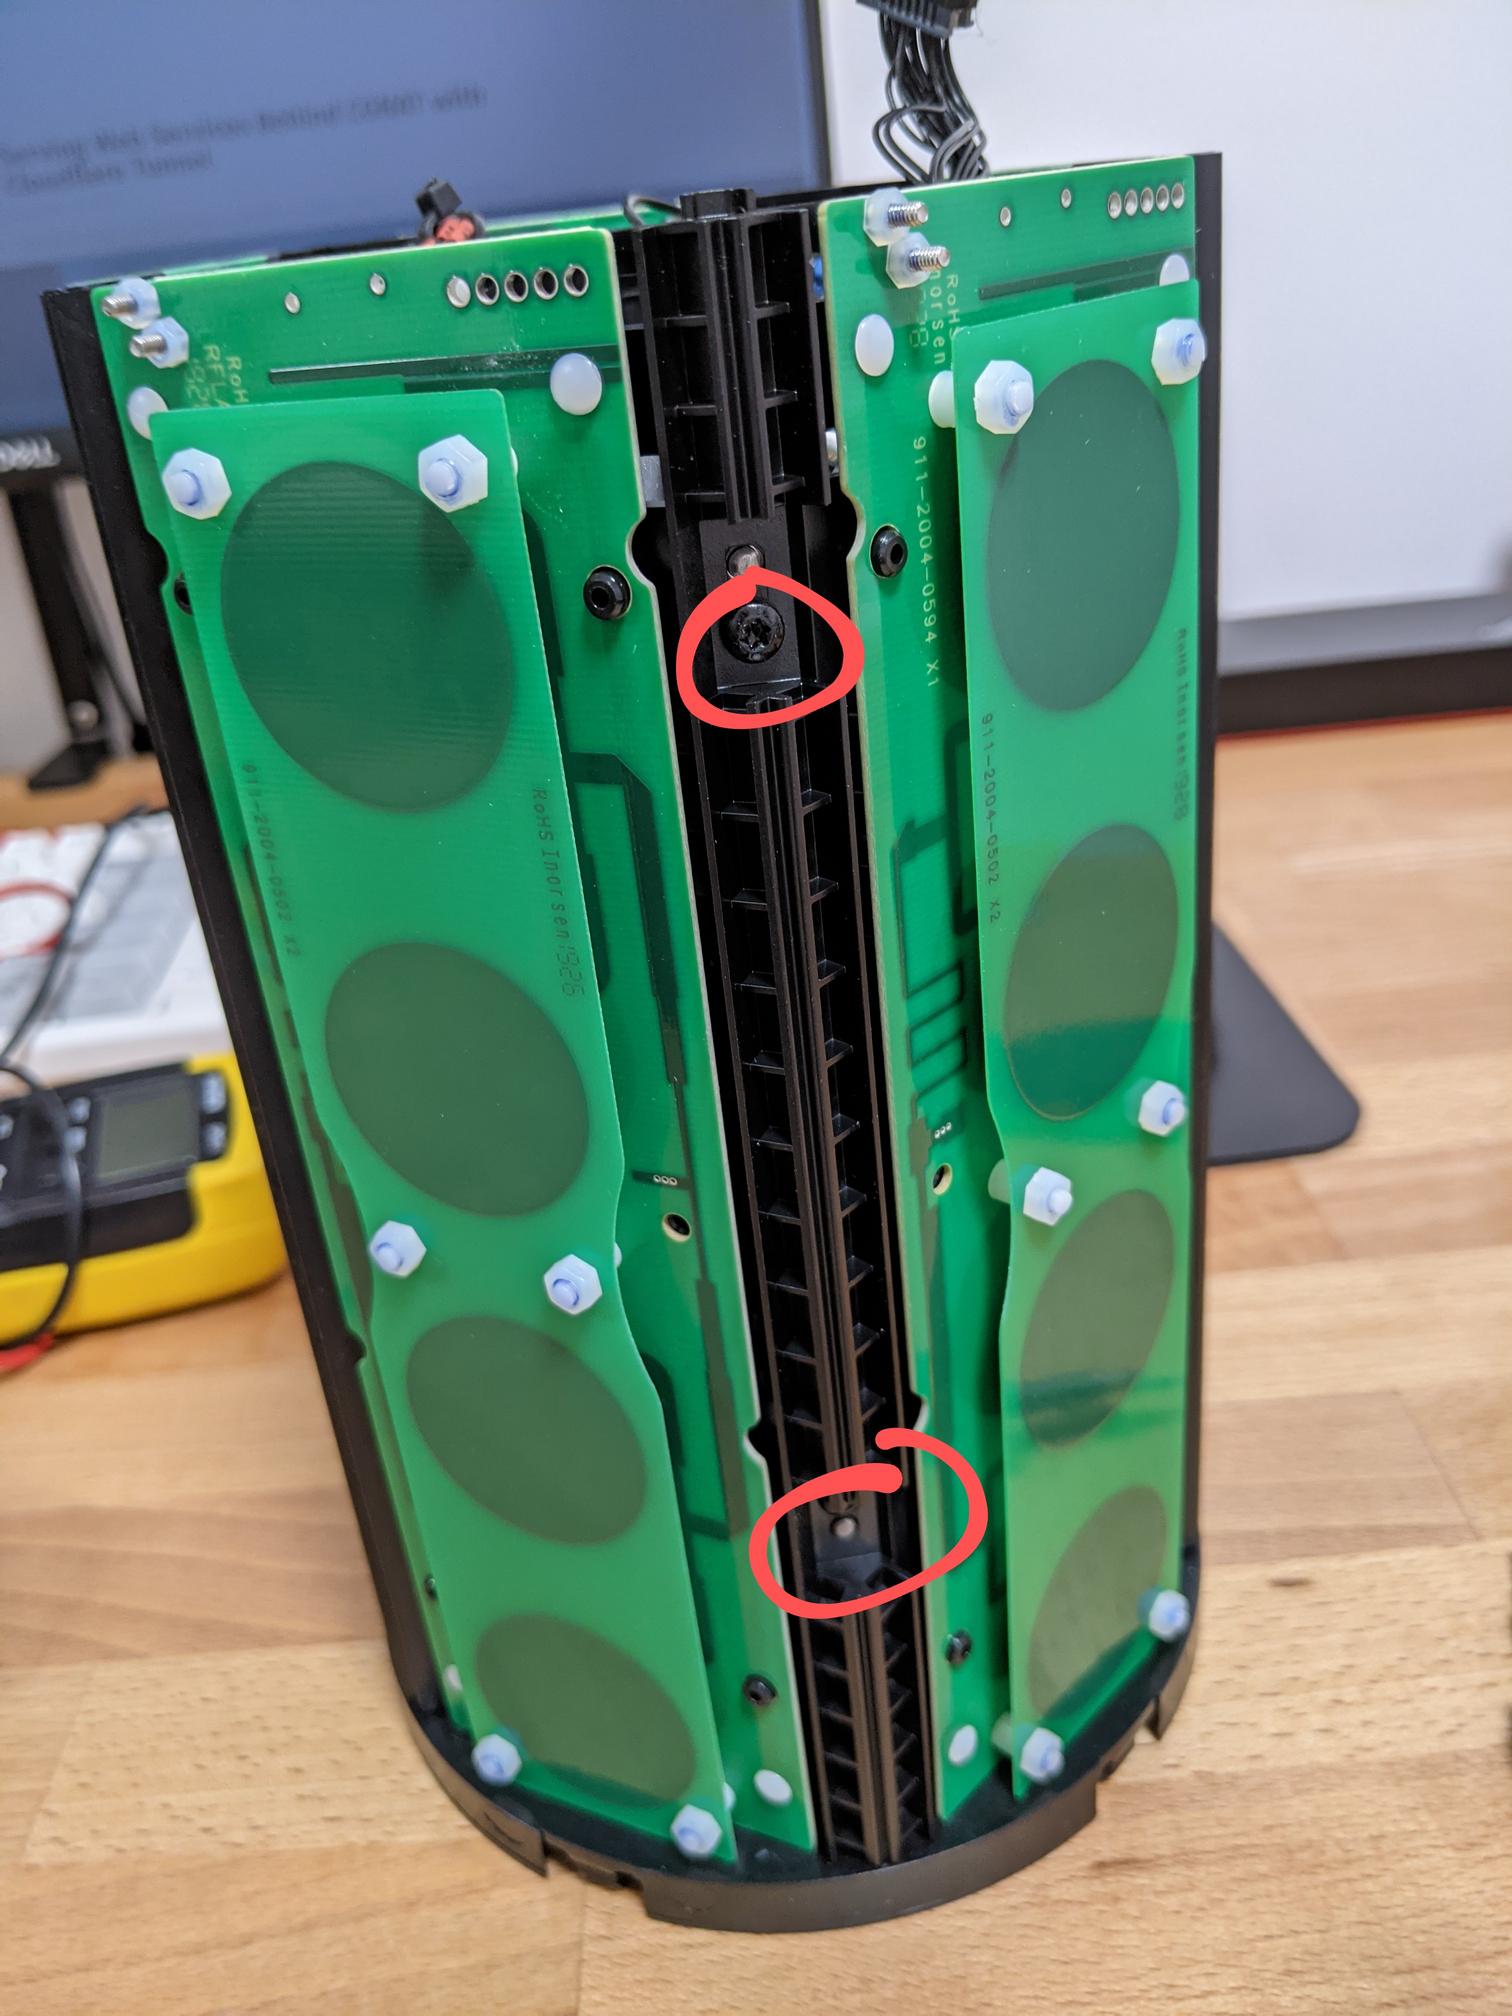
This allows you to lift up 2/5 sides of the antenna assembly revealing the Android device.
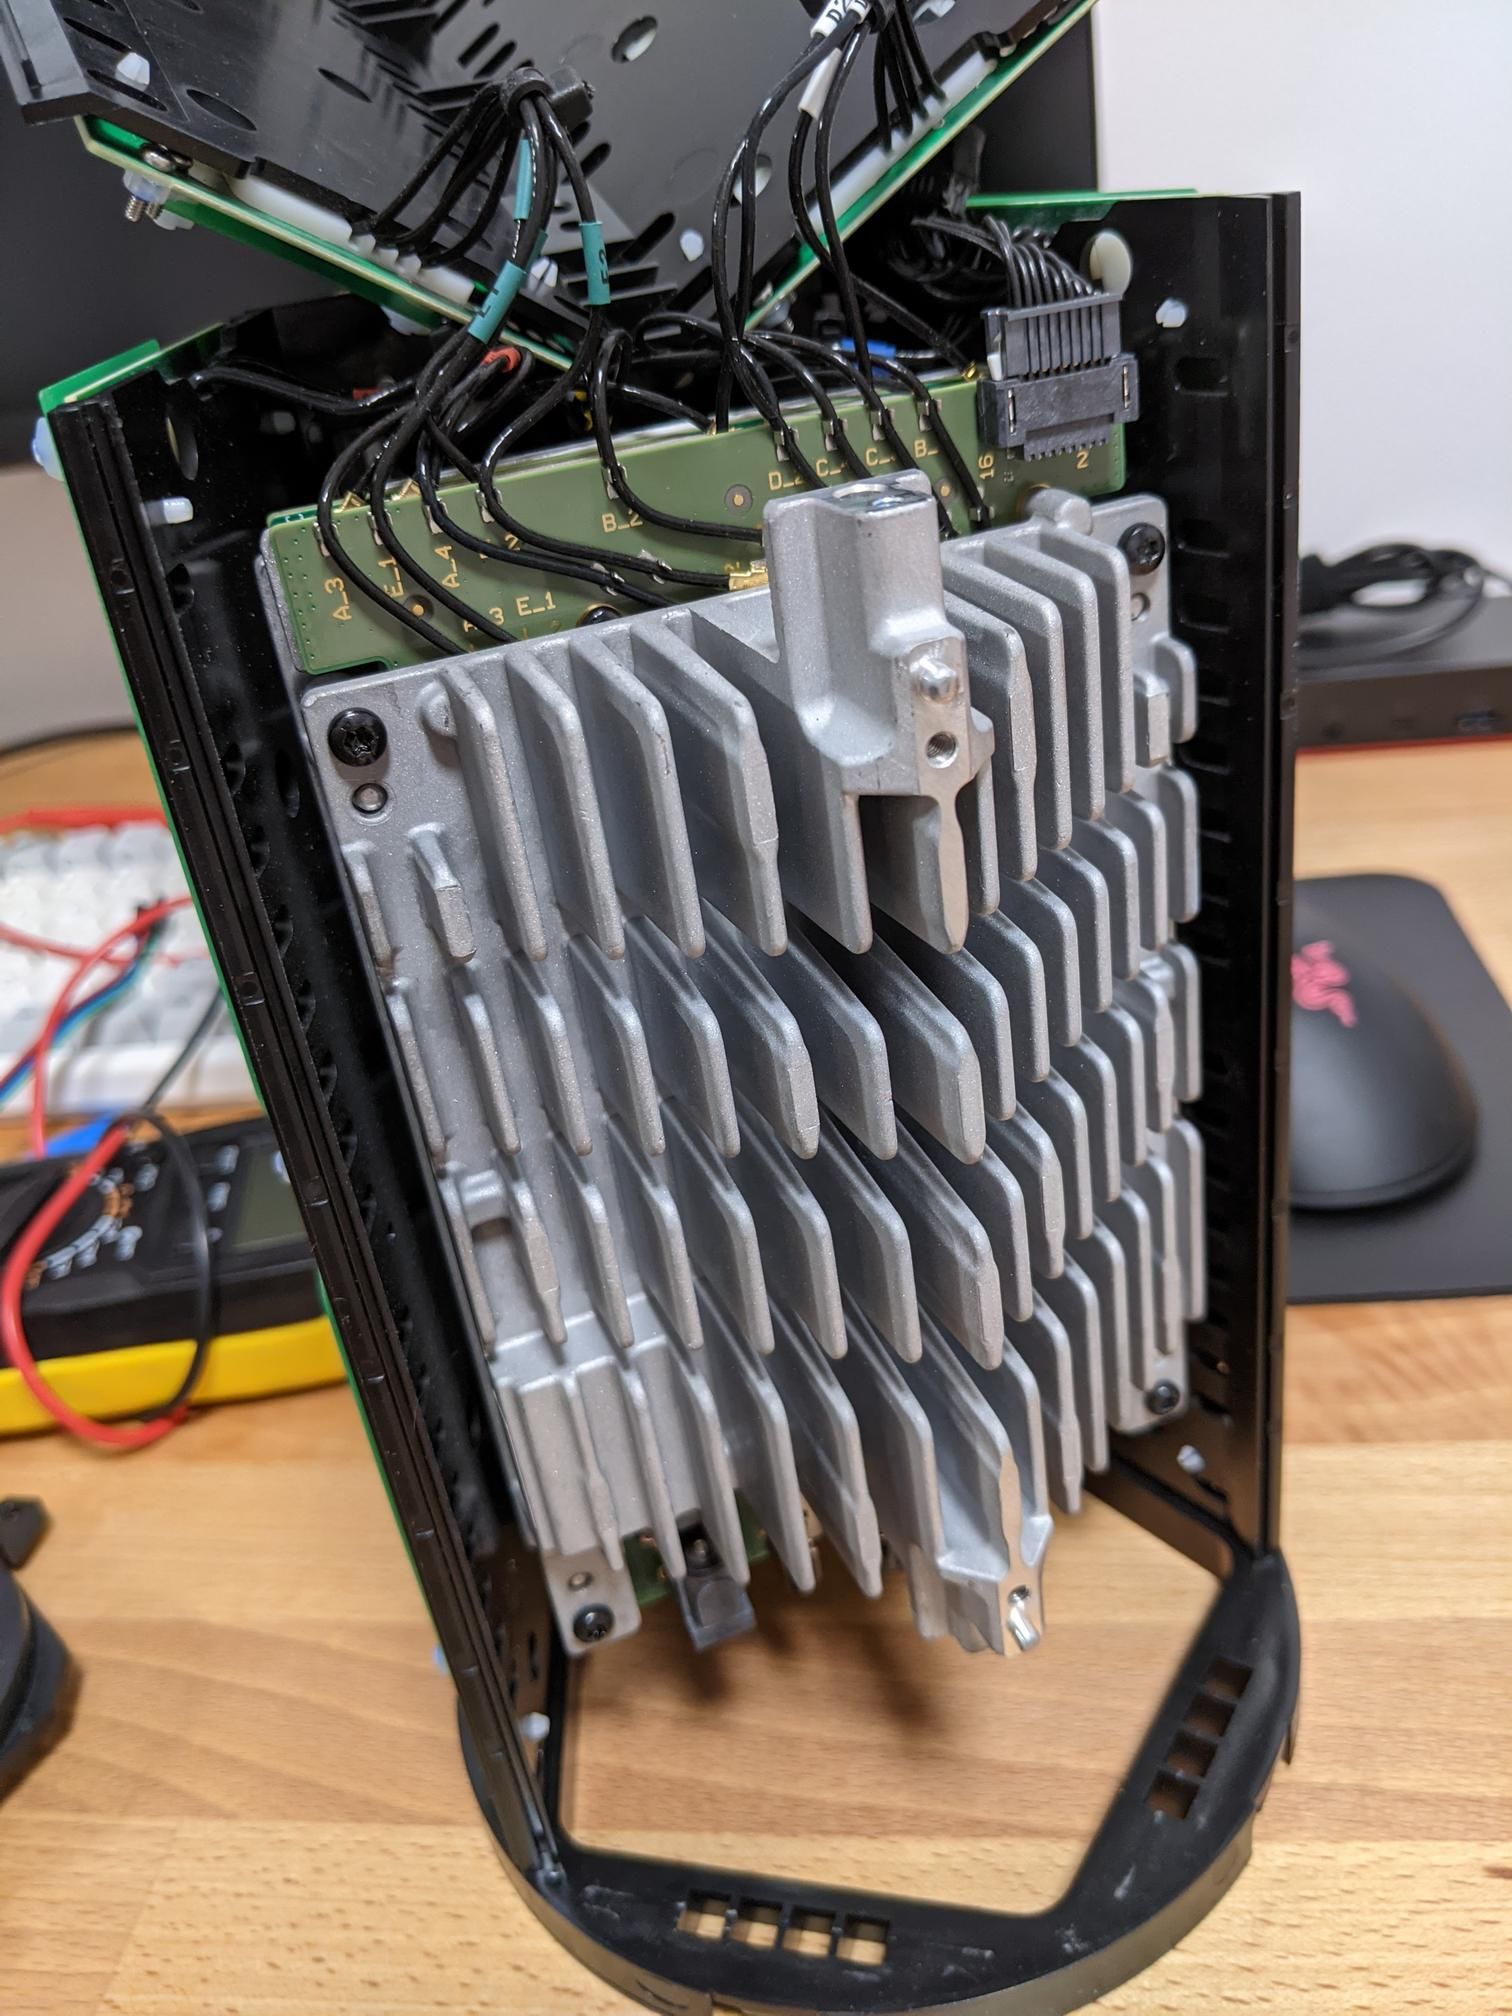
Removing the 4 bolts that hold the Android side in allows you to lift and fold the device over like we’ve done with the antenna panels.
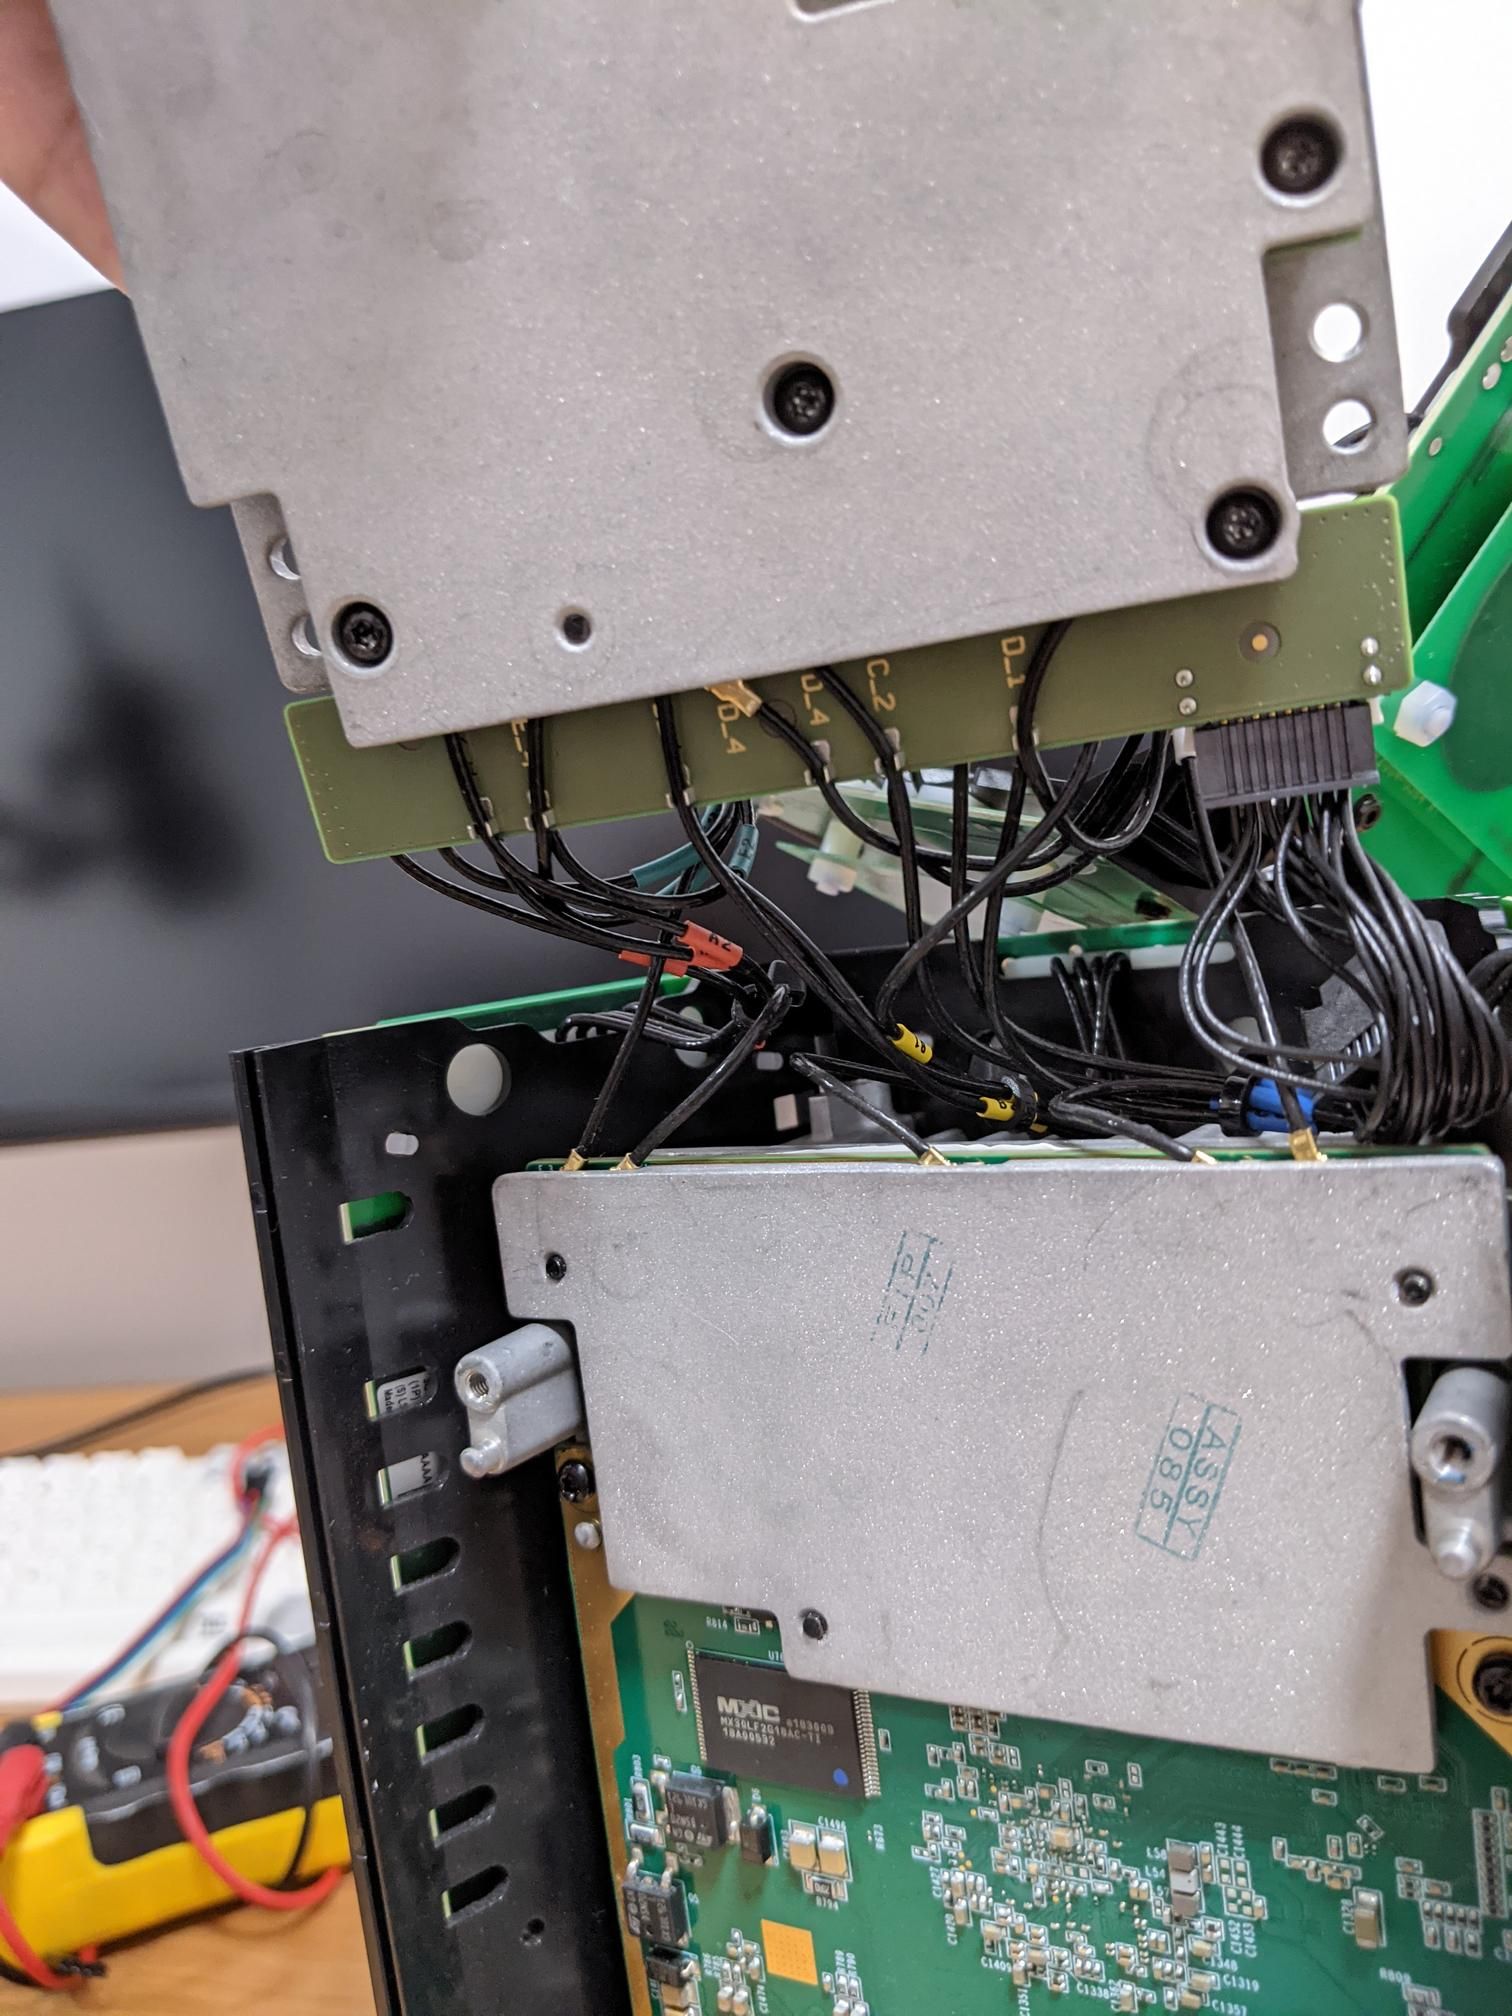
This also reveals the backside of the Alcatel-Lucent router and the only electrical interconnect between the two devices in the bottom right.
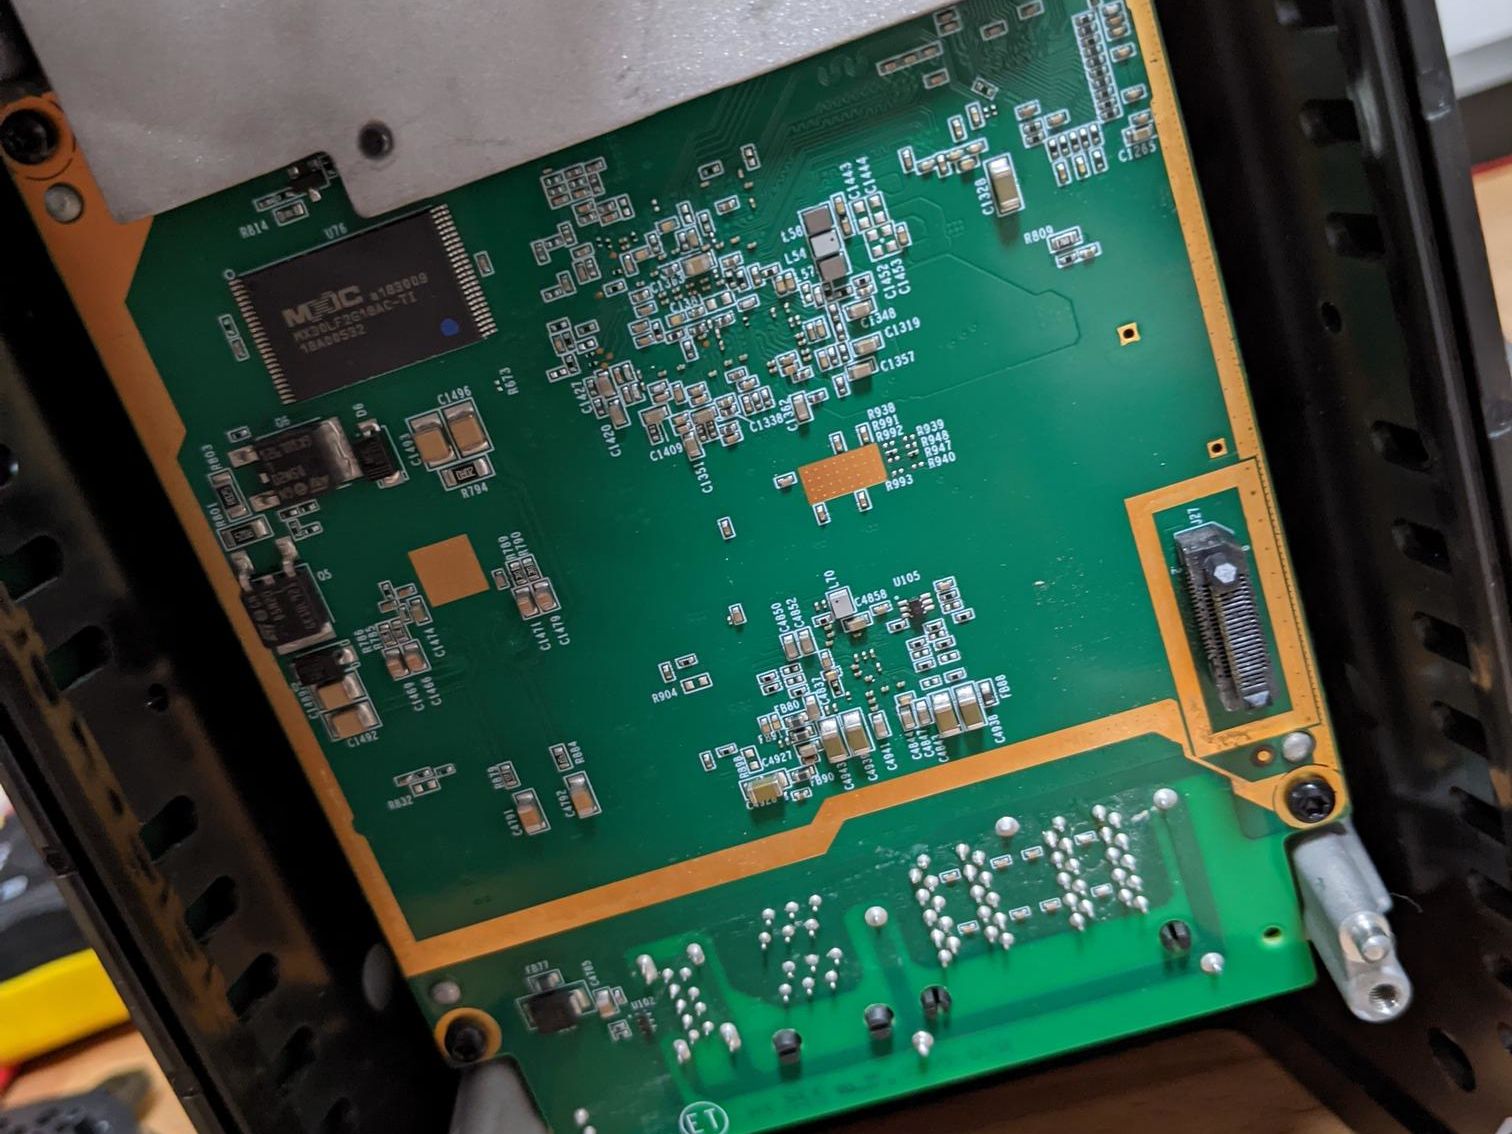
I didn’t go any further as the router side is mostly covered up by it’s heatsink and if it’s anything like the Android side then it was likely to also be difficult to remove.